


SWITCHERS
9
9
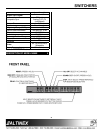
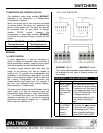
7.5 MASTER/SLAVE CONTROL (RS-232):
The feedback codes allow multiple
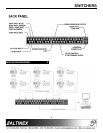
MX2226AT
Switchers to be connected in a Master-Slave
configuration, if desired.
When the control port of two units are connected
as shown below, the slave unit duplicates the
actions of the master unit. The slave unit can still
be controlled from its front panel or through
another RS-232 control; however this
configuration is used when multiple
MX2226AT
units
must be controlled through a single RS-232
source.
Master MX2226AT
Terminal block pin
Slave MX2226AT
Terminal block pin
TX RX
GND GND
Master-Slave Control Port Connection of the
MX2226AT
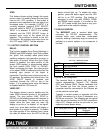
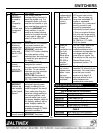
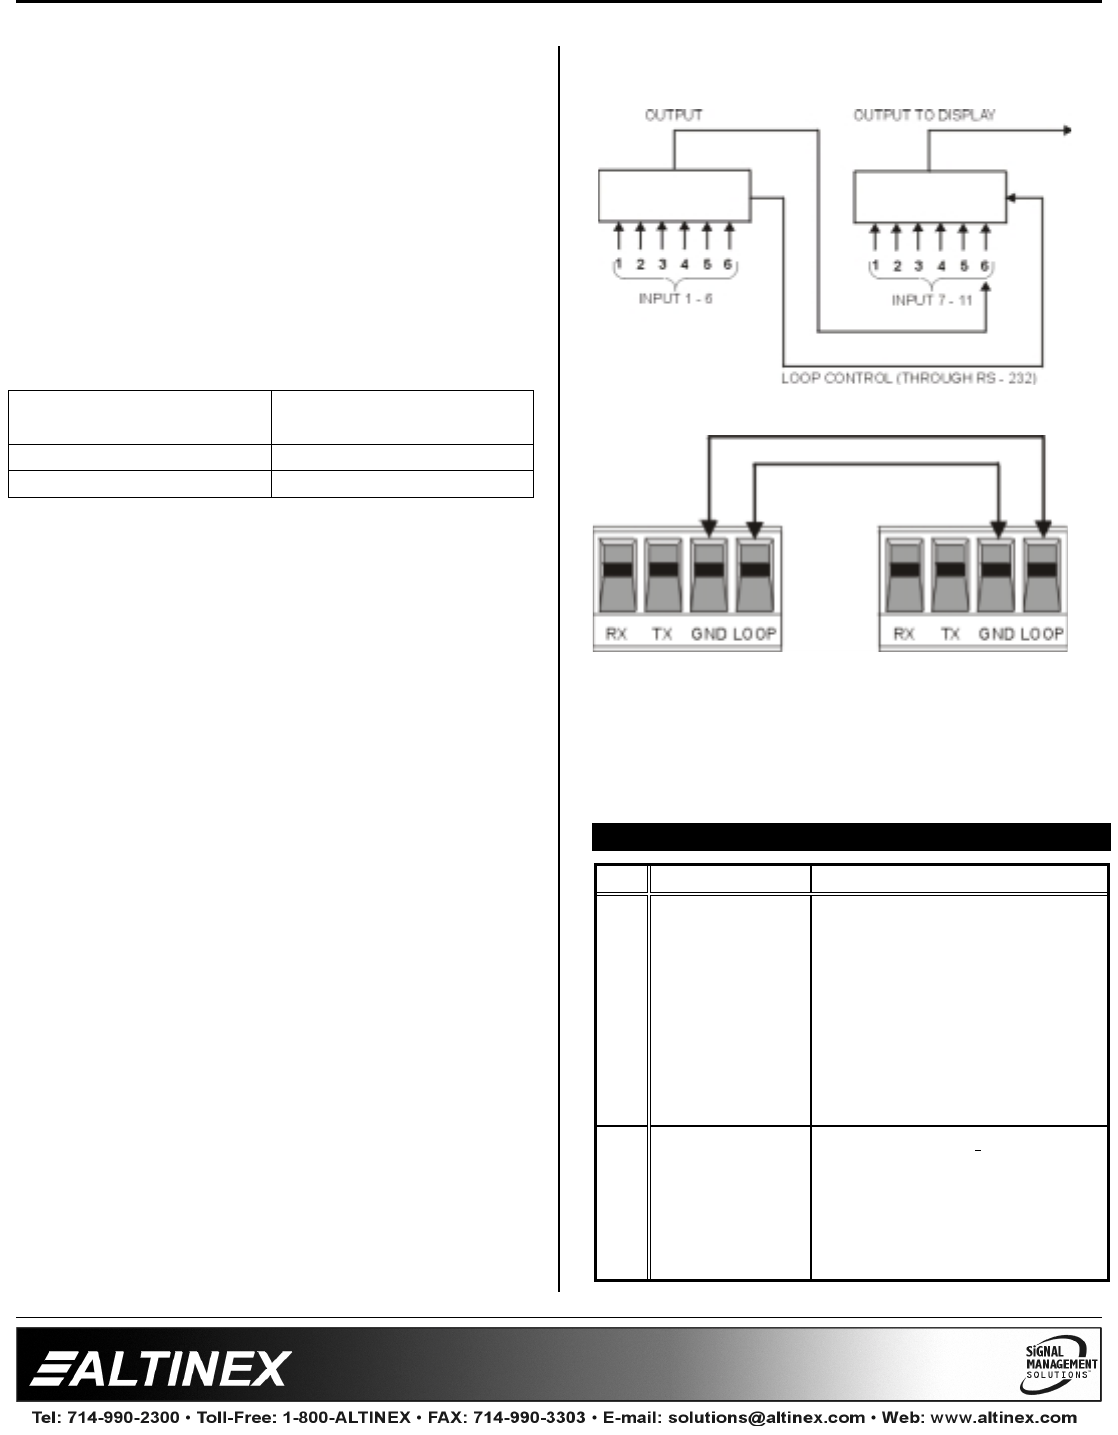
7.6 LOOP CONTROL
In some applications, it may be necessary to
switch a number of computer video sources to a
single presentation display, requiring more inputs
than are available from an individual switcher.
To create a larger switcher with more input, the
output of the previous unit can be looped to
another unit. To maintain the completeness and
availability of the incoming video signal, no more
than 3 units should be looped. Keep in mind that
the Looping Configuration will eliminate one
usable input for each looped unit. For example, if
two 6-in 1-out switchers were looped together,
there would be 11 usable inputs.
The loop control feature forces all looped units to
select input 6 so that the incoming signal will
automatically pass through. If input from switcher
no. 1 is selected then input no. 6 is automatically
selected on switcher no. 2, so that an incoming
signal from the output of switcher no. 1 is passed
to the output of switcher no. 2.
11-IN 1-OUT SWITCHER
MX2226AT Unit #1 MX2226AT Unit #2
The coaxial cable between looped switchers must
be arranged so that Input 6 always accepts the
loop output.
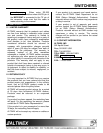
FREQUENTLY ASKED QUESTIONS 8
No Question Answer
1
When I press
the RESET
button, the
switcher does
not respond.
Why?
You must press and hold
the button for approximately
2 seconds, until you hear a
short beeping sound until all
of the LED lights flash. This
is designed to avoid
accidental resetting of the
unit just by touching the
key.
2
When l press
the SOUND
button, the
switcher
doesn’t
respond.
You must press and hold
the button
for approximately
2 seconds, until
you hear
the beeping sound. This
is
done to set the switcher in
either BEEP ON or BEEP