


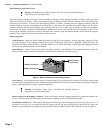
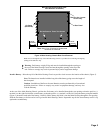


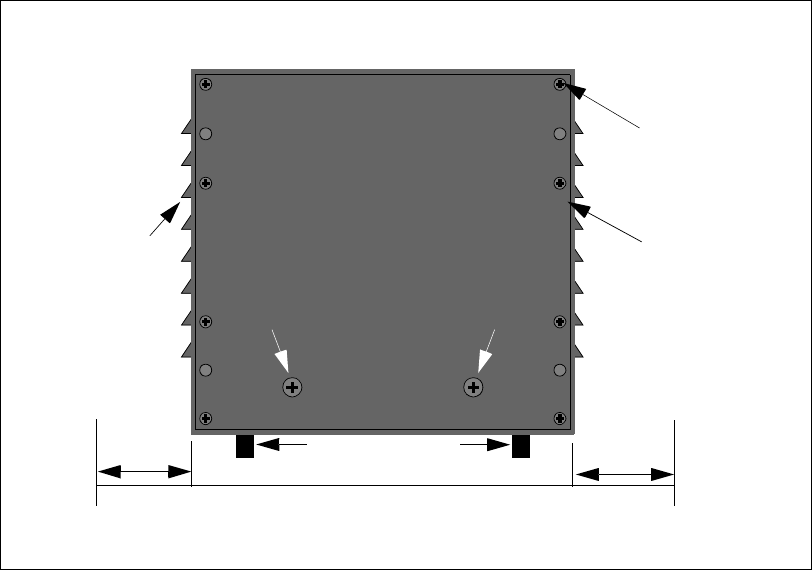
Figure 4. Main Housing Chassis Rear Panel Removal
Note: Access through the top of the Main Housing Chassis is provided for connecting and topping
(filling) of the batteries only.
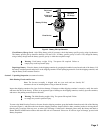
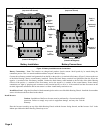
Install a Battery - Raise the top lid of the Main Housing Chassis to provide visual access to the interior of the chassis (Figure 5).
Note: The batteries are installed with the long side of the battery going across the length of
the front panel.
Caution: Installation of the Power Inverter Batteries must be performed by a licensed and
qualified electrician. Failure to comply may result in equipment damage, and may also
void the Warranty.
At the rear of the Main Housing Chassis, position the first battery to be installed through the rear opening so that the positive (+)
terminal is to the right. Position the second battery so that the positive (+) terminal is to the left. Grasp the battery using the handles
(Figure 2) located at each end of the battery. Carefully lift the battery and slide it into the Main Housing through the rear opening.
Slide the first battery as far forward as it will go into the Main Housing Chassis. Repeat this step for the second battery until it is up
against the second battery.
Page 5
Main Housing Chassis (Rear View -
Wire Harness not Shown)
Rear Panel
Air Vents
(Each Side)
Note: Allow 15 cm (6 inches) of unobstructed
clearance on each side.
Wheels (4).
15 cm
(6 inches)
15 cm
(6 inches)
Remove the 4 corner
screws only.
Do Not Remove These Two Screws
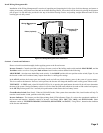
Warning: Each battery weighs 28 kg, and must be installed through the opening at
the rear of the Main Housing Chassis and not through the opening in the top of the
unit. Failure to comply may result in personal injury and/or equipment damage
!