Installation
Page 2-6
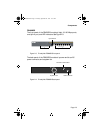
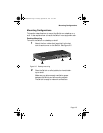
Wall Mounting the FS4004DS
The FS4004DS comes with a wall-mount kit.
▲ Important! The FS4008DS cannot be mounted on a
wall.
To mount the FS4004DS on a wall, consider the following when select-
ing a site for the FS4004DS:
❏ Select a site that is free of obstructions from other
equipment or devices
❏ Place the Switch high enough to easily observe LED
indicators and to allow for easy power and cable access
❏ Decide whether you want the Switch’s front panel to
face either up or down
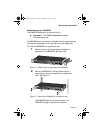
To mount the FS4004DS on a wall:
1 Measure the screw holes on the bottom of the
FS4004DS.
2 Drill two holes into the wall equalling the same dis-
tance as measured in step 1.
▲ Important! Do not drill the holes too deep into
the wall.
3 Insert the plastic anchors (supplied) into the drilled
holes and gently tap them in with a hammer.
4 Insert and turn the screws (supplied) into the plas-
tic anchors, leaving a small portion of the screws
sticking out.
5 Lift the FS4004DS and align the slots on the bottom
of the FS4004DS with the screw anchors.
6 Gently slide the FS4004DS onto the screws.
The FS4004DS wall mounting is complete. The
FS4004DS is ready for network connections.
FRCH1Book Page 6 Thursday, September 25, 1997 11:23 AM


