1-121-12
1-121-12
1-12
Chapter 1: Product introductionChapter 1: Product introduction
Chapter 1: Product introductionChapter 1: Product introduction
Chapter 1: Product introduction
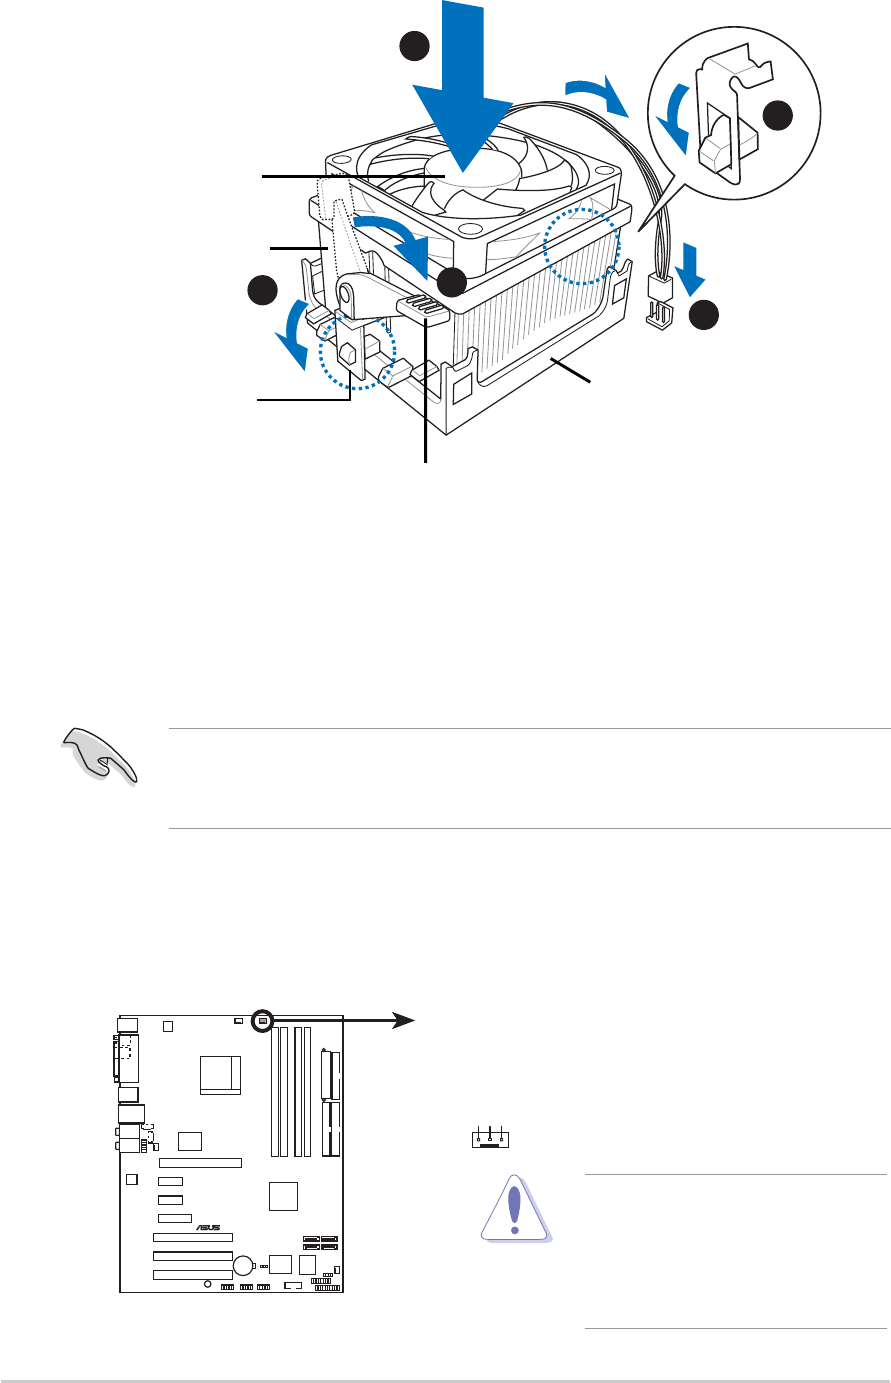
Follow these steps to install the CPU heatsink and fan.
1
3
4
5
2
Retention Module BaseRetention Module Base
Retention Module BaseRetention Module Base
Retention Module Base
CPU HeatsinkCPU Heatsink
CPU HeatsinkCPU Heatsink
CPU Heatsink
CPU FanCPU Fan
CPU FanCPU Fan
CPU Fan
Retention bracket lockRetention bracket lock
Retention bracket lockRetention bracket lock
Retention bracket lock
Retention bracketRetention bracket
Retention bracketRetention bracket
Retention bracket
DO NOT forget to connect
the CPU fan connector!
Hardware monitoring error
can occur if you fail to plug
this connector.
1. Place the heatsink on top of the installed CPU.
2. Attach one end of the retention bracket to the retention module
base.
3. Align the other end of the retention bracket (near the retention
bracket lock) to the retention module base. A clicking sound denotes
that the retention bracket is in place.
4. Push down the retention bracket lock on the retention mechanism to
secure the heatsink and fan to the module base.
5. When the fan and heatsink assembly is in place, connect the CPU fan
cable to the connector on the motherboard.
Make sure that the fan and heatsink assembly perfectly fits the
retention mechanism module base, otherwise you cannot snap the
retention bracket in place.
A8N5X
®
A8N5X CPU fan connector
CPU_FA
N
GND
Rotation
+12V


