ASUS AT5IONT-I Series 1-2
AT5IO
N
T-I
D
ELUXE
AAFP
SB_PWR
SATA_PWR1
CHA_FAN
PWR_FAN
CPU_FAN
Lithium Cell
CMOS Power
NEC
USB3.0
ALC
887
RTL
8112
ICS
9LRS954
P17C9X20
Super
I/O
JMB
360
8Mb
BIOS
CLRTC
PS2_USBPW1-4
USBPW56
17.1cm(6.75in)
17.1cm(6.75in)
Intel
®
NM10
Intel
®
Atom D525
DDR3 SO-DIMM_A1 (64bit, 204-pin module)
DDR3 SO-DIMM_A2 (64bit, 204-pin module)
NVIDIA
®
ION2010
SATA1
SATA2
KBMS
DC_PWR/
WiFi
antenna
AUDIO
LAN1_USB3.0_12
ESATA
_USB34
_BT
F_PANEL
USB56
SPEAKER
SPDIFO_HDMI
DVI
PCIEX4_1
7
1 2
8
3
4
5
6
13 12 11 9
3
10
1.2 Motherboard overview
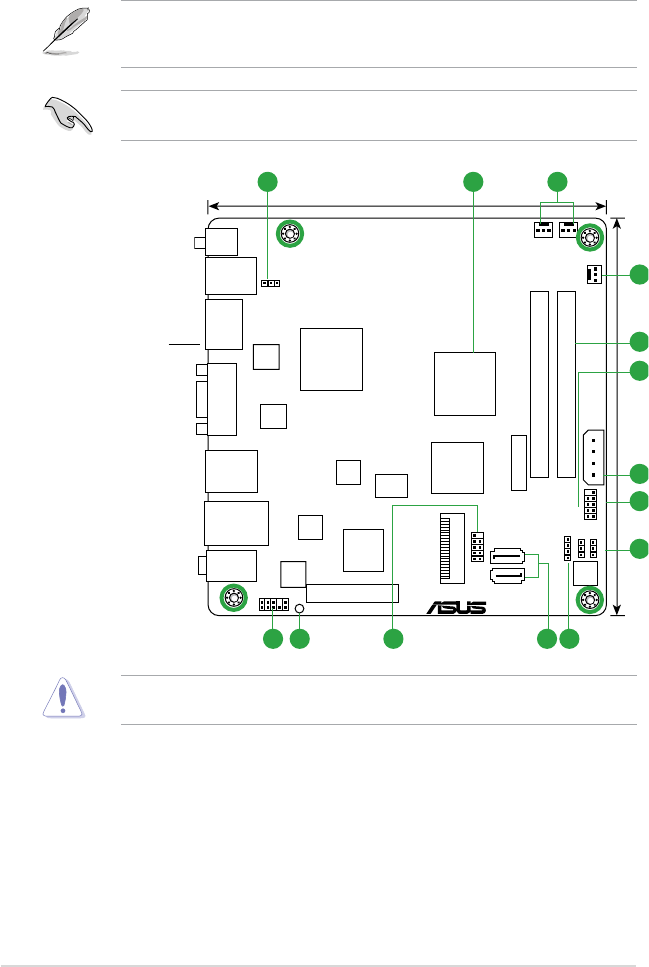
1.2.1 Motherboard layout
Place four screws into the holes indicated by circles to secure the motherboard to the
chassis. DO NOT overtighten the screws! Doing so can damage the motherboard.
Ensure that you install the motherboard into the chassis in the correct orientation. The edge
with external ports goes to the rear part of the chassis.
Place this side towards
the rear of the chassis.
ASUS AT5IONT-I Series motherboards include AT5IONT-I and AT5IONT-I DELUXE two
models. The layout varies with models. The layout illustrations in this user guide are for
AT5IONT-I DELUXE only.


