


3-6
Chapter 3: Software support
1. Install the Serial ATA hard disks into the drive bays.
2. Connect one end of the Serial ATA cable to the motherboard’s primary Serial
ATA connector (SATA1).
3. Connect the other end of Serial ATA cable to the master Serial ATA hard disk.
4. Connect one end of the second Serial ATA cable to the motherboard’s
secondary Serial ATA connector (SATA2).
5. Connect the other end of Serial ATA cable to the secondary Serial ATA hard
disk.
6. Connect the Serial ATA power cable to the power connector on each drive.
7. Proceed to section 5.4.2 “Entering VIA
®
Tech RAID BIOS Utility” for the next
procedure.
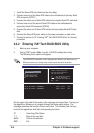
3.3.2 Entering VIA
®
Tech RAID BIOS Utility
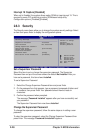
1. Boot-up your computer.
2. During POST, press <Tab> to enter VIA RAID configuration utility.
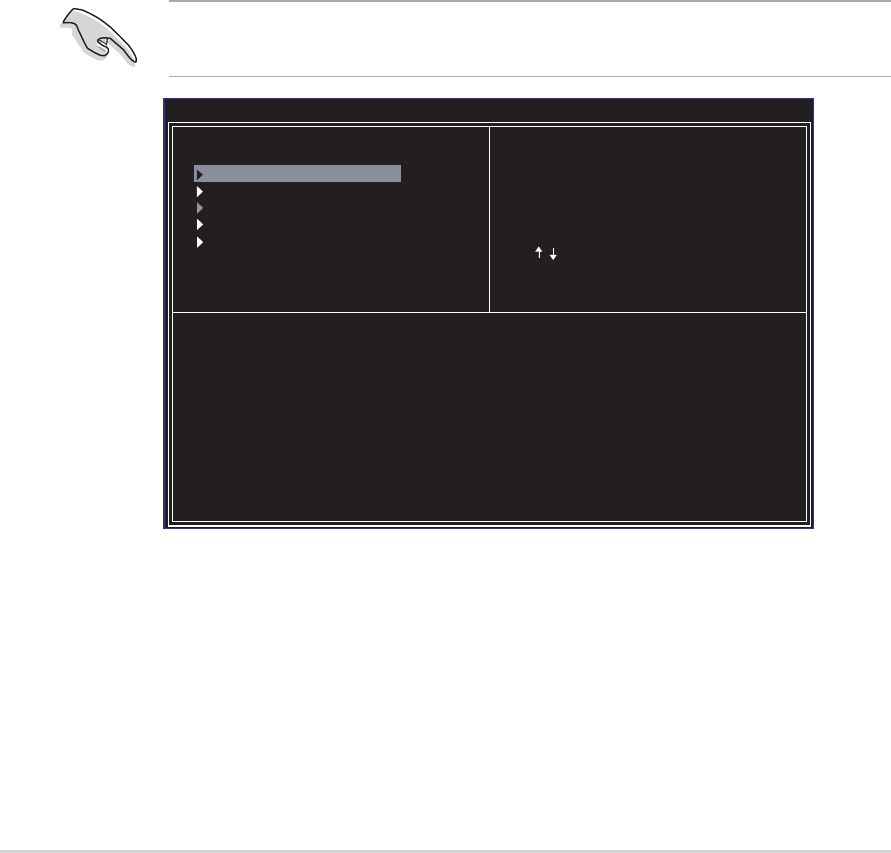
The following menu options will appear.
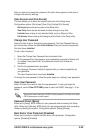
Channel Drive Name Array Name Mode Size(GB) Status
Serial_Ch0 Master XXXXXXXXXX xxxxx xxx.xx Hdd
Serial_Ch1 Master XXXXXXXXXX xxxxx xxx.xx Hdd
VIA Tech. RAID BIOS Ver 1.XX
Create Array
Delete Array
Create/Delete Spare
Select Boot Array
Serial Number View
Create a RAID array with
the hard disk attached to
VIA IDE controller
F1 : View Array/Disk Status
, : Move to next item
Enter: Confirme the selection
ESC : Exit
On the upper-right side of the screen is the message and legend box. The keys on
the legend box allows you to navigate through the setup menu options. The
message describes the function of each menu item. The following lists the keys
found in the legend box with their corresponding functions.
F1 : View Array/Disk Status
↑, ↓ : Move to the next item
Enter : Confirm the selection
ESC : Exit
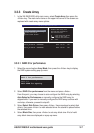
The RAID BIOS information on the setup screen shown is for reference only.
What you see on your screen may not be exactly the same as shown.