


USB-N66 WLAN Adapter User Manual
5
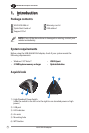
ASUS WLAN adapter
LED Status Description
Link High The USB-N66 has connected to a wireless network successfully.
Low The USB-N66 is not connected.USB-N66 is not connected. is not connected.
Blinking WPS function is enabled. Wait for about two minutes for WPS
function to establish the connection.
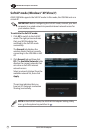
Enabling the WPS (for Windows
®
OS only)
To enable the WPS feature, you may either press the WPS button on the USB-
N66 or select Use the WPS button in the USB-N66’s web interface.
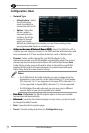
Status indicator
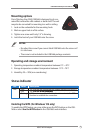
Mounting options
Out of the box, the ASUS USB-N66 is designed to sit on a
raised at surface like a le cabinet or book shelf. The unit
may also be converted for mounting to a wall or ceiling.
1. Look on the underside for the mounting hook.
2. Mark an upper hole in a at surface.
3. Tighten one screw until only 1/4’’ is showing.
4. Latch the hook of your USB-N66 onto the screw.
NOTES:
• Re-adjust the screw if you cannot latch USB-N66 onto the screw or if
it is too loose.
• The screw is not included in the USB-N66 package contents.
Operating and storage environment
1. Operating temperature: ambient temperature between 0˚C ~ 40˚C
2. Storage temperature: ambient temperature between -10˚C ~ 70˚C
3. Humidity: 5% ~ 90% (non-condensing)