


28 OutLook ES Series Installer/User Guide
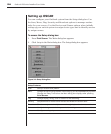
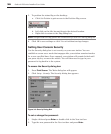
To remove a server from the scan list:
1. In the Scan dialog box, click the server to be removed.
2. Press Delete.
— or—
Press Shift+Delete to remove the selected server and all entries below it.
3. Click OK.
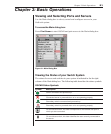
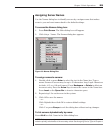
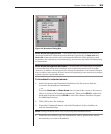
To set up a custom scan pattern:
1. In the Scan dialog box, type the name or port number of the server you want
to scan.
— or—
On the rst line, press Insert; the rst server listed in the Main dialog box
appears. To select the server to include in your scan pattern, use the
following keyboard commands in the Name, Port or Sec column:
a Press Alt+Down Arrow to move the cursor down the list of servers.
b Press Alt+Up Arrow to move the cursor up the list of servers.
c Press Alt+Home to move the cursor to the rst server listed.
d Press Alt+End to move the cursor to the last server listed.
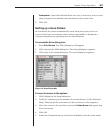
2. In the Sec column, type the number of seconds (from 1 to 99) of desired
Delay Time before the scan moves to the next server in the sequence.
3. Move the cursor to the next line or press the Down Arrow and repeat steps 1
and 2 for each of the remaining servers to be included in the scan pattern.
4. Click OK.
NOTE: If you later remove a server from the list in the Device Modify dialog box, this change
may affect a custom scan pattern.
To start the scan mode:
Select Scan Enabled in the Commands menu.
To cancel scan mode:
Clear Scan Enabled in the Commands menu if OSCAR is open.
— or—
Select a server if OSCAR is open.
— or—
Move the mouse or press any key on the keyboard if OSCAR is not open. Scan
will stop at the currently selected server.