


AXIS 560/660 User’s Guide Basic Installation
7
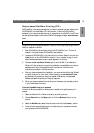
Connecting the printer to the Network
Follow the instructions below to connect a printer to the network via the AXIS
560/660 print server:
Caution!
1. Make sure that the printer is switched off and that the AXIS 560/660 external
power supply is disconnected.
2. Locate the serial number, found on the underside label of the AXIS 560/660, and
write it down. You will need this number during the network configuration.
Note:
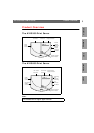
3. Connect the printer to the LPT1, LPT2, or COM1 port on the AXIS 560/660
using an appropriate printer cable.
4. Connect your AXIS 560/660 to the network using either a twisted pair
(10baseT) or thin wire (10base2) cable.
5. For the AXIS 660 only: Slide the Ring Speed switch to 4 or 16, as appropriate for
your Token Ring network.
6. Switch on the printer and connect the external power supply to the AXIS
560/660. The power indicator light comes on. If the network indicator starts to
flash, the AXIS 560/660 is successfully connected to the network.
7. Press and release the test button on the AXIS 560/660 to print a test page. If the
AXIS 560/660 is correctly connected to the printer, the AXIS 560/660 internal
test page will be printed.
Note:
The external power supply you are using must be marked with the correct mains voltage! Refer to
Hardware Inventory, on page 6.
Each AXIS 560/660 Print Server is pre-configured with a unique node address that is identical
to the serial number.
The AXIS 560/660 will print to the first printer it finds on its ports LPT1, LPT2 and COM1, in
that order.
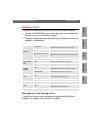
NetWare
UNIX
Windows
OS/2
Macintosh