


Installation Guidelines
3-2 5975987A BARCODATA 708 260597
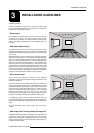
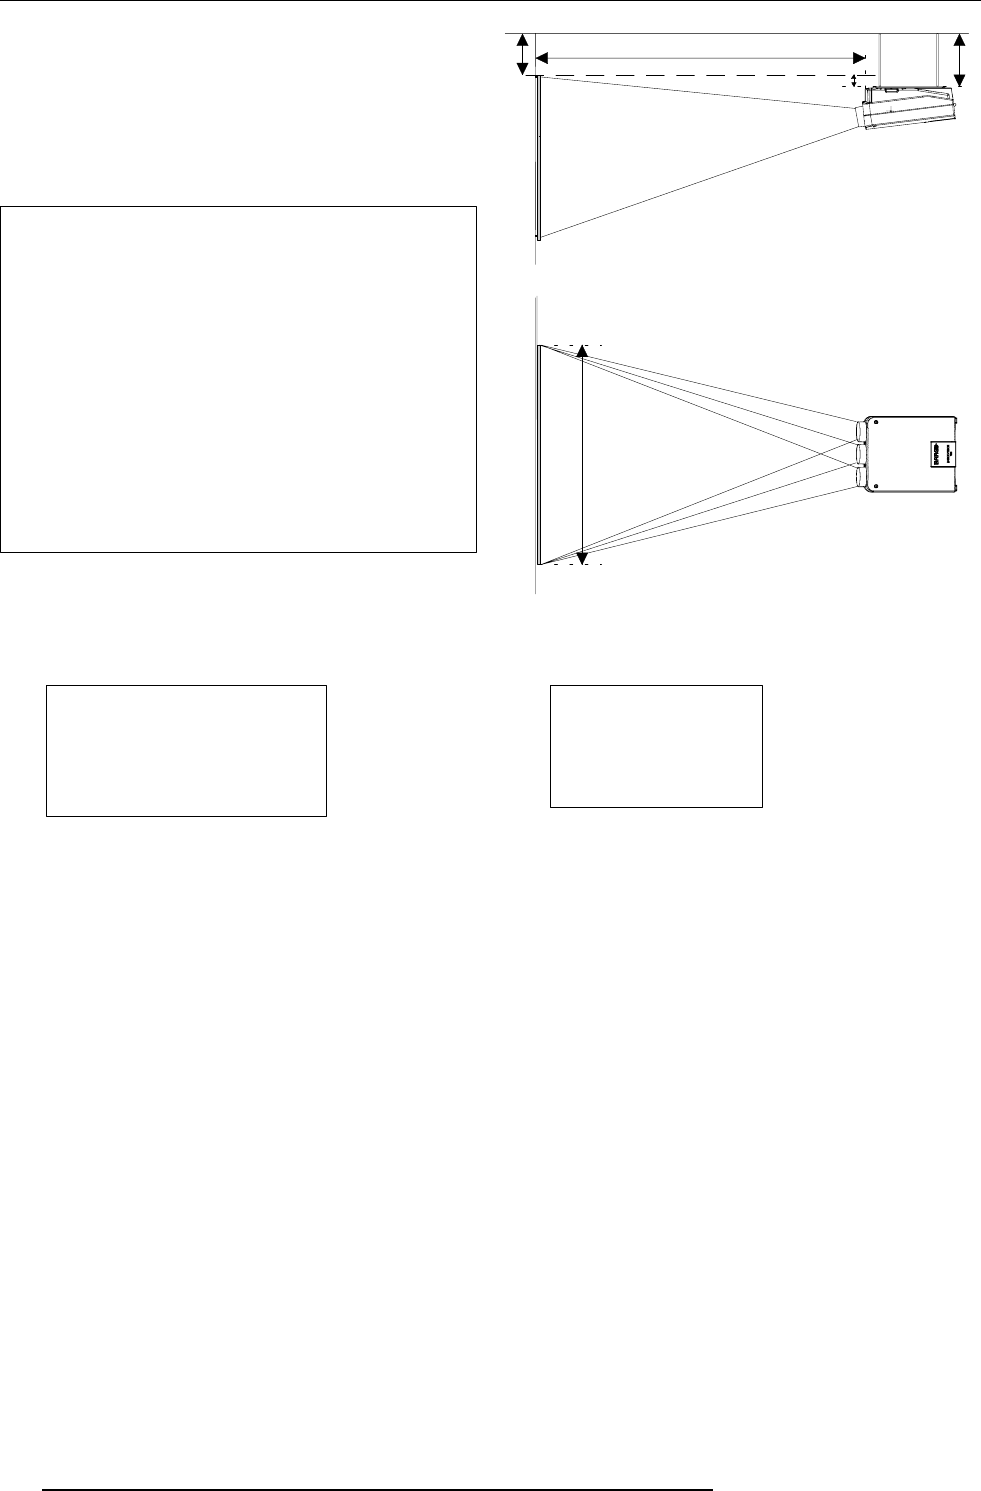
* Where to install the projector?
To indicate a correct installation position it is necessary to know the
distance :
- projector - ceiling
- projector - screen
To find this correct position for the projector, equipped with HD145
lenses, formulas are given in the next paragraph.
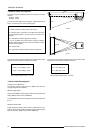
Abbreviations used on drawing and diagrams on next pages
B = Distance between ceiling and top of the screen.
A = Correction Value, extra value to be added to B to obtain the
correct installation position. (In some cases the A value can be
negative.)
CD = Total distance between projector and ceiling.
CD = A + B (When the result is negative, enlarge the distance
between ceiling and top of the screen, mount screen lower, until CD
becomes zero or positive)
SW = Screen width.
PD = Perpendicular distance between screen and projector.
A
CD
PD
B
screen
projector
ceiling
screen width
SW
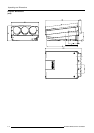
Front view
Top view
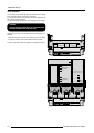
Formulas for Projector to screen distance and correction value A with
regard to the screen width for
HD145 lenses
(metric).
Formulas (metric)
PD[m] = 1.21 x SW[m] + 0.213
A[cm] = 12.95 x SW[m] - 22.83
Formulas for Projector to screen distance and correction value A with
regard to the screen width for
HD145 lenses
(inch).
Formulas (inch)
PD = 1.21 x SW + 8.39
A = 0.1295 x SW - 8.99
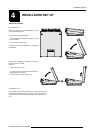
* How to install the projector?
Ceiling mount or table mount?
To install the projector, apply always the BARCO kits which are
specially designed for this function.
BARCO ceiling support.
Always use the BARCO ceiling support to attach your projector to the
ceiling. (BARCO order number : R9827990)
The installation instruction for this support is enclosed in the packet of
the set.
BARCO projection table.
Height adaptable projection table provides a stable stand for your
projector, and makes it possible to adapt the projector perfectly to the
local requirements. (BARCO order number R9827740).
Max phosphor width on CRT = 11.5 cm
Max phosphor width on CRT = 4.53 inch