Connections
3-1
5975977 BARCODATA 708 260597
3
CONNECTIONS
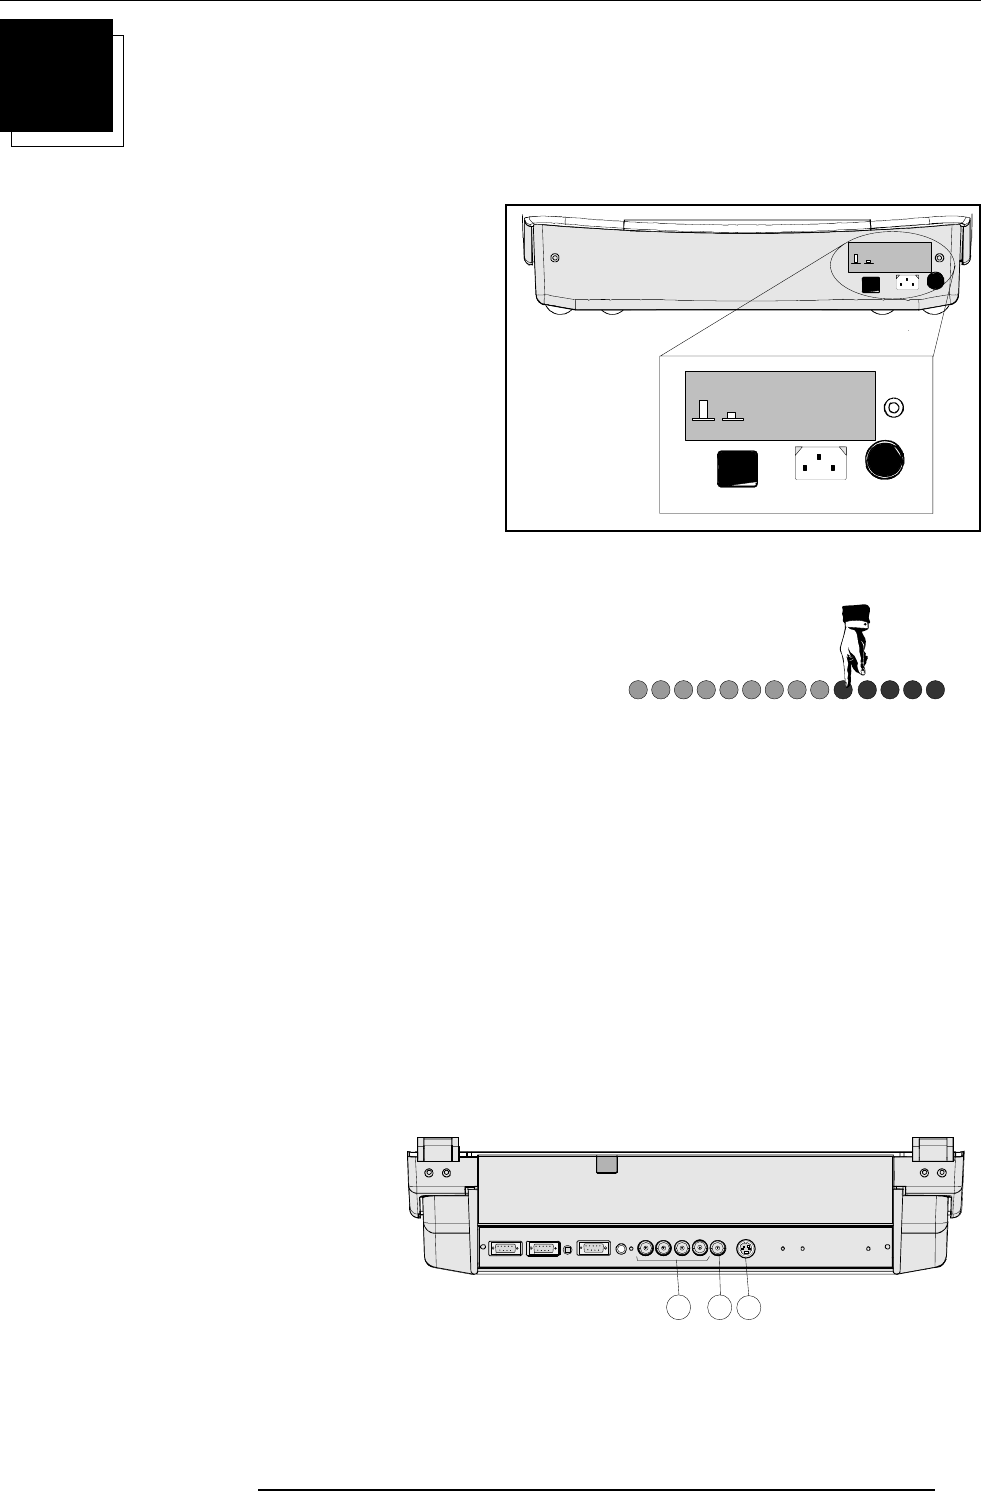
Power (mains) cord connection
Use the supplied power cord to connect your projector to the
wall outlet. Plug the female power connector into the male
connector at the front of the projector.
See installation instructions before
connecting to the supply
V NOM 120/230 Volt
I MAX 5/2.5 AMP
FREQ 60/50 Hz
OFF
ON
See installation instructions before
connecting to the supply
V NOM 120/230 Volt
I MAX 5/2.5 AMP
FREQ 60/50 Hz
OFF
ON
The projector is switched ON and OFF using the power
(mains) switch ON/OFF.
Pressed : ON
Not pressed : OFF
The projector can start now in the 'operational mode' (image
displayed) or in the 'stand by mode', depending on the
position of the 'power up' dip switch on the controller unit. This
DIP switch is set during installation by a qualified technician.
If you want to change this start up mode, call a qualified
technician.
-9V
HOLD DOWN HD
COINC
SF
HOLD DOWN EHT
STANDBY
-CONV
-17V
+17V
+HTHD
+CONV
+9V
+210V
+30V
Leds on the front plate of the projector
Switching on/off
Signal input connection to the projector :
- Composite Video (*)
- S-Video (*)
- RGBS or RGsB
- RGB3S or RG3sB
- (R-Y)Y(B-Y)S or (R-Y)Ys(B-Y) [component input] (**)
- (R-Y)Y(B-Y)3S or (R-Y)Y3s(B-Y) [component input] (**)
(*) If the line double feature is built in, this feature is available via a software on/off toggle.
(**) If the line double feature is built in, this feature is available for component video signals on standard
frequency via software on/off toggle.
3
1 2
COMM PORT
(800 peripherals)
REMOTE
RG(S)B
S
VID EO
S-V IDEO
R- Y Y( S)
B-Y
RS232 OUT
RS232 IN


