


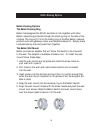

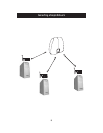

To connect your computers to the Belkin Switch, each computer must
be equipped with a network interface card/adapter such as an
internal PCI card (for desktop computers), a PC card (for notebook
computers), or a USB Ethernet adapter (an alternative to opening up
your PC; for USB-equipped computers only). Each computer connects
to the Belkin Switch via a CAT5 networking cable. You will need one
networking cable for each PC.
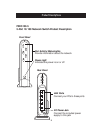
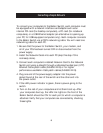
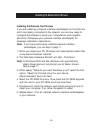
1. Be sure that the power to the Belkin Switch, your modem, and
all of your PCs has been turned OFF or disconnected from the
power supply.
2. Install the Network Cards into each PC (skip this step if this
is already done).
3. Connect each computer’s installed Network Card to the Network
Switch port using a straight through unshielded twisted pair (UTP)
Ethernet Cat5e patch cable (A3L850-XX-S) or for higher
performance use Belkin Cat6 patch cables (A3L980-XX-S).
4. Plug one end of the power-supply adapter into the power
socket found at the rear of the switch and the other end into
the power outlet.
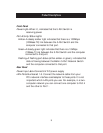
5. If the LED power indicator is green, there is power going to the
switch.
6. Turn on the rest of your computers and let them boot up. After
your computers boot up, the LAN link lights on the front of the
Belkin Switch should be ON for each port to which a computer is
attached. Verify that your computers are connected by checking
these lights.
Connecting a Simple Network
8