


4 Compact T1 - Release 6.1
Quick Start
Wall Mounting
Wall Mounting
Before beginning the mounting process, verify that the area meets the following
requirements:
l A stable environment, clean and free from extremes of temperature, shock,
vibration and EMI, that meets the all installation environment requirements, see
Installation Environment on page 1-2.
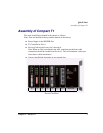
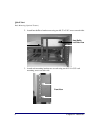
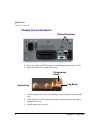
The Unit is delivered with a mounting bracket attached for quick and easy wall
mounting, as shown in the illustration above.
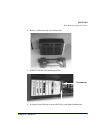
To install the unit to the wall, attach the unit using the four screws provided, one at each
bracket foot.
NOTE: Do not mount the Unit in any other orientation as show above.
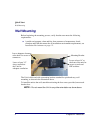
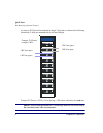
Leave at least 3.5"
above and below
the Unit for
adequate ventilation
Mounting Bracket
Leave adequate clearance
at the back for access to
connectors
Leave at least 14" at
the front of the unit for
access to cards and
DIP switches