36
2.048Mb
p
s Wireless Modem
SALES: 0118 965 5100
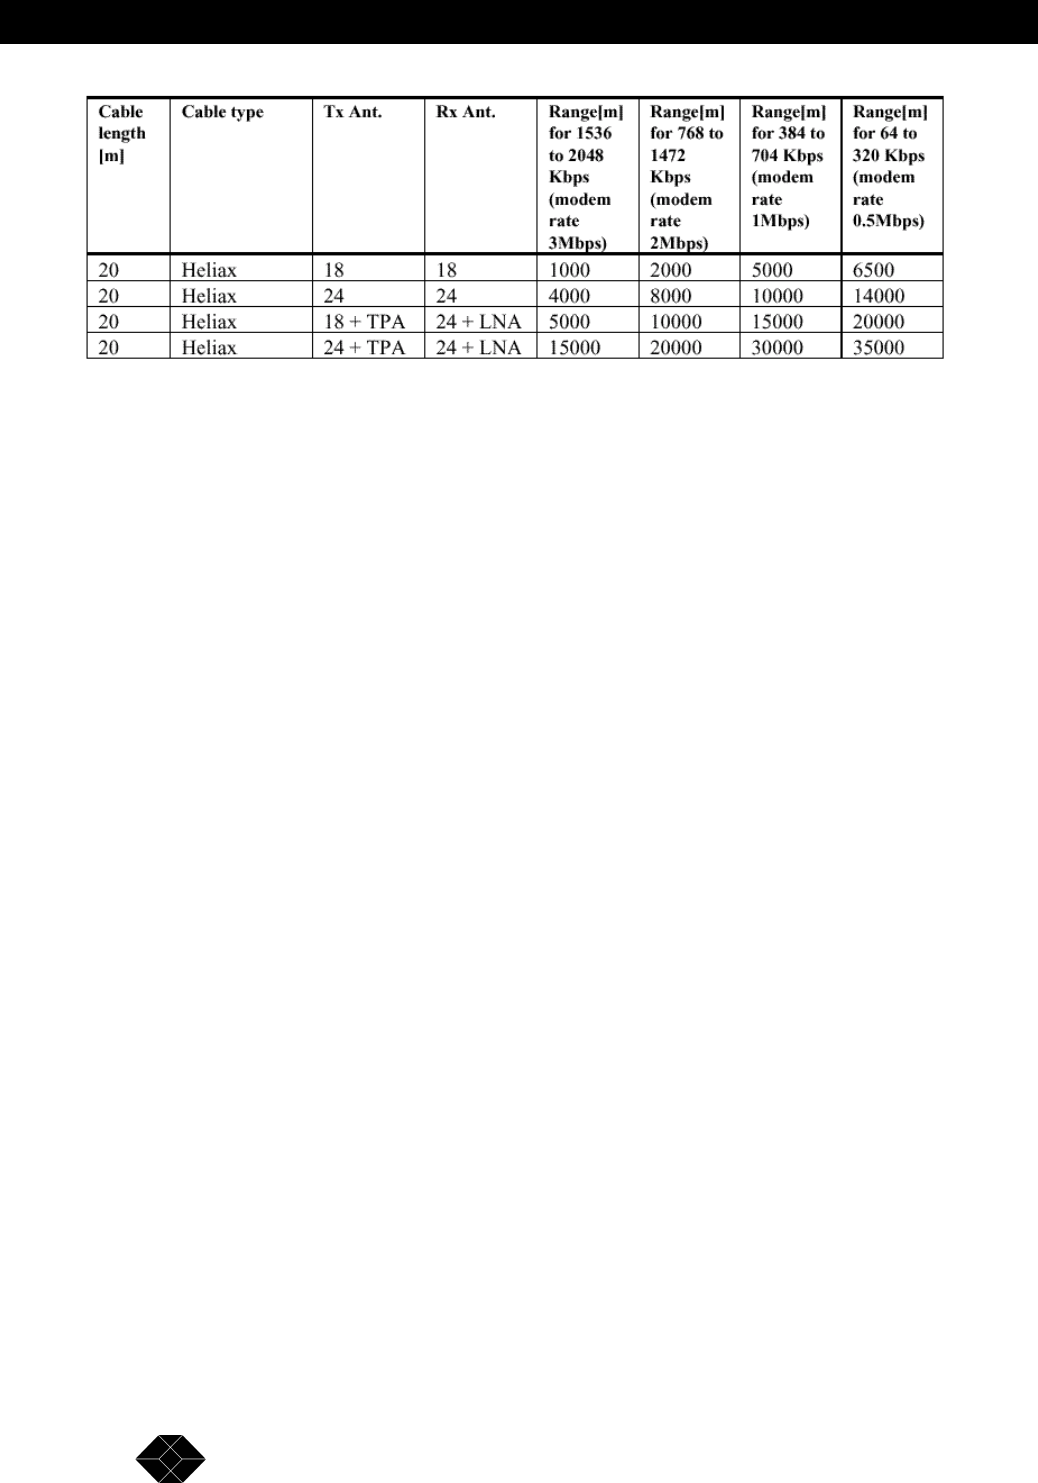
Table 2-6. Maximum (Unregulated) Range Table
Antenna Alignment
In order to function properly and to provide quality results, the modems on either side of the
link must have a stable RF link. The alignment procedure is performed in three steps. First,
you visually align the antennas on both sides of the link. Next, you activate the Radio and
Line LEDs on the front panels of the units (which show basic synchronization) by a process
of adjusting the antennas. Finally, you fine-tune the adjustment of the antenna using the
RSSI (Received Signal Strength Indication) measurement procedure, described below.
For more information on pre-installation (Site Survey mode) and post-installation tests
(Counters and Tracers menu) see Chapter 3.
Step-1 Visually Aligning the antennas
1. Loosen the screws on the U-bolt that fasten the antenna to the mast (or the bolts on the wall
mount), and slowly move the antenna up and down (elevation) and from side-to-side
(azimuth), until the antenna points roughly in the direction of the site on the other side of the
link. For long distance links or when it is not possible to see the remote location, use a GPS
or a map and a compass for the first alignment.
2. Tighten the screws on the U-bolt (or the bolts on the wall mount).
Note: Repeat for each antenna - Rx and Tx on both units.
Step 2 –Activating the front panel LEDs
Two pairs of LEDs on the 2.048Mbps Wireless Modem front panel are lit when the units are
synchronized. When the Radio LEDs are both lit it is an indication that the radio link is
synchronized, and when the Line RXD and TXD LEDs are lit it is an indication that the line
to the DTE is synchronized.


