


47
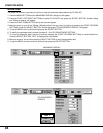
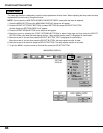
SETTING
DISPLAY
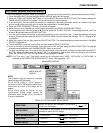
MAIN MENU DISPLAY
1. Press the MENU BUTTON and the MAIN MENU DISPLAY dialog box will appear.
2. Press the POINT LEFT/RIGHT BUTTON(s) to select SETTING and press the SELECT BUTTON. Another dialog box
SETTING DISPLAY will appear.
3. Press the POINT DOWN BUTTON and a red arrow will appear.
4. Move the arrow to an item you want to set by pressing the POINT UP/DOWN BUTTON(s).
5. If you want to change the setting, press the SELECT BUTTON.
6. To quit the MENU, point to Quit and then press the SELECT BUTTON.
7. The settings are memorized even if the MAIN ON/OFF is switched off.
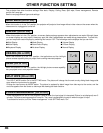
OTHER FUNCTION SETTING
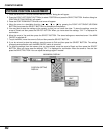
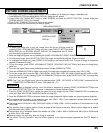
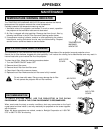
REMOTE CONTROL CODE CHANGE (Mode 1 or Mode 2)
This projector can be operated with two different code, one is factory-set normal code (MODE 1) and the other one is
extended code (MODE 2).
This is used to prevent the remote control operation mixture (jam) when two projector and several remote control video
equipments are system-up and used together.
When you change the code MODE 2, you must change both projector and Remote Control Unit.
Mode 1
Mode 2
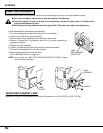
To chang
e Projector code;
Set REMOTE CONTROL in SETTING menu (below figure) to "MODE 2".
To change Remote Control Unit code;
Press both "MENU" and "NORMAL" button on the Remote Control Unit for over 10
seconds.
After code changed, make sure the Remote Control operation is functioning properly. To
go back to normal code (MODE 1), take same operation above.
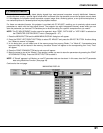
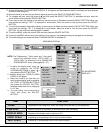
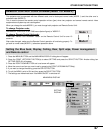
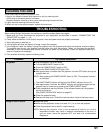
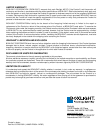
Setting the Blue back, Display, Ceiling, Rear, Split wipe, Power management
and Remote control
Auto