


GT-3 Series
2. Identifying Your Printer’s Parts
8
2. Identifying Your Printer’s Parts
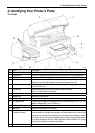
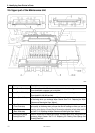
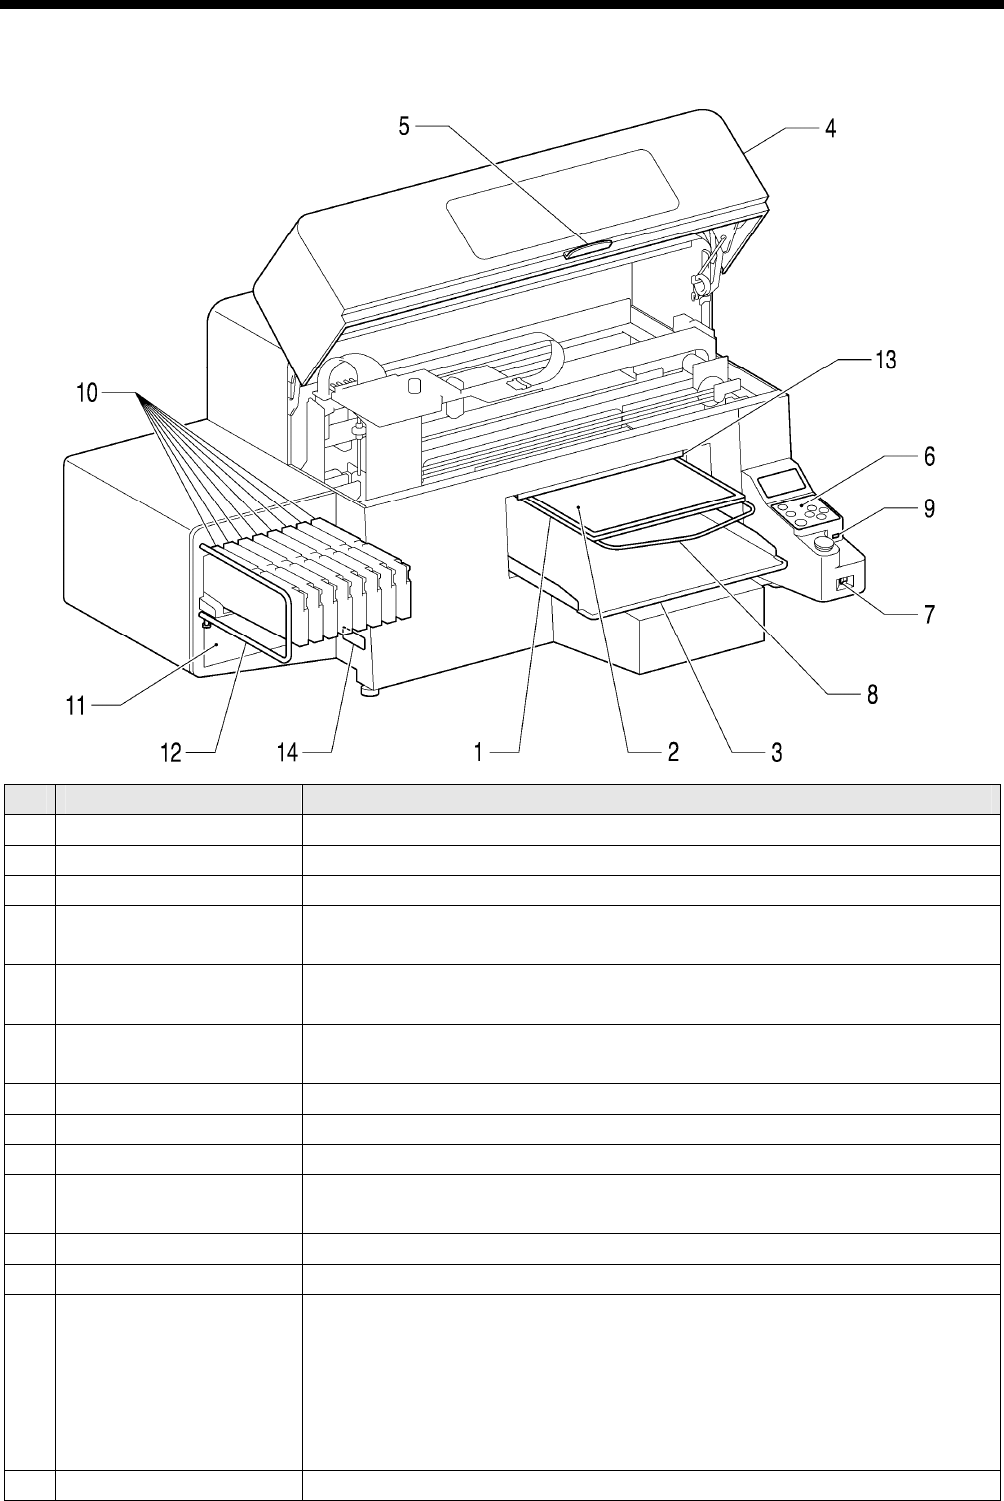
2-1. Front
0043Y
No. Name Description
1 Platen Holds the T-shirt to be printed.
2 Platen Sheet Prevents a T-shirt from slipping so that an image is printed on your desired position.
3 T-shirt Tray Keeps parts of T-shirt hanging from the Platen (e.g. sleeves) on this T-shirt Tray.
4 Front Cover Open this to work on the inside of your printer, after you turn OFF the printer. (If you
open the Front Cover while operating, the power automatically turns off.)
5 Stop Lever Unlocks the lock of the Front Cover. Keep pushing it to release the lock when you
close the Front Cover.
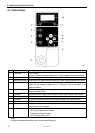
6 Control Panel Indicates the status of the printer. Use this to operate your printer.
See “2-7. Control Panel” for the details.
7 Power Switch Turns on/off your printer.
8 Shoulder Bar Adjusts the T-shirt position.
9 USB flash drive Slot Inserts USB flash drive.
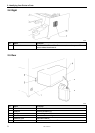
10 Ink Cartridge Slots Load the Ink Cartridges of the appropriate color: from the left side W1, W2, W3, W4,
Black(K), Magenta (M), Cyan (C), Yellow (Y).
11 Ink Cartridge Storage Stores the new Ink Cartridges.
12 Guard Bar Keeps the loading space of the Platens.
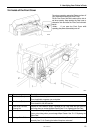
13 Clearance Sensor
(Obstruction Sensor)
Cancels an operation for safety, if it detects obstructions on the Platen. When you
lower the platen for printing thicker materials, use Platen Button on the Control Panel
and check the movement if the material does not hit the flap of the Clearance Sensor.
The sensor will not work when the clearance between the print head and the material
is too wide (the platen is too low). Confirm the platen height by referring "4-5. Placing
the T-shirt on the Platen" in the Instruction Manual.
14 Model Plate Indicates the serial number of the product.