Troubleshooting
140
6
LCD messages 6
As with any sophisticated office product, errors may occur and consumable items may need to be replaced.
If this happens, your machine automatically stops printing, diagnoses the problem, and displays the resulting
message on the LCD to alert you. The most common error and maintenance messages are shown below.
You can clear most errors and routine maintenance messages by yourself, referring to the following tables.
If you need more help, the Brother Solutions Center offers the latest FAQs and troubleshooting tips.
Visit us at http://solutions.brother.com/
.
If you cannot clear the problem, call the dealer you bought the machine from or Brother Customer Service.
Note
The LCD names for the paper trays are as follows.
• Standard paper tray: Tray 1
• Multi-purpose tray: MP
• Optional lower tray unit: Tray 2
Error messages
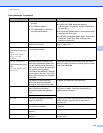
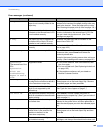
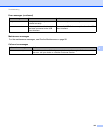
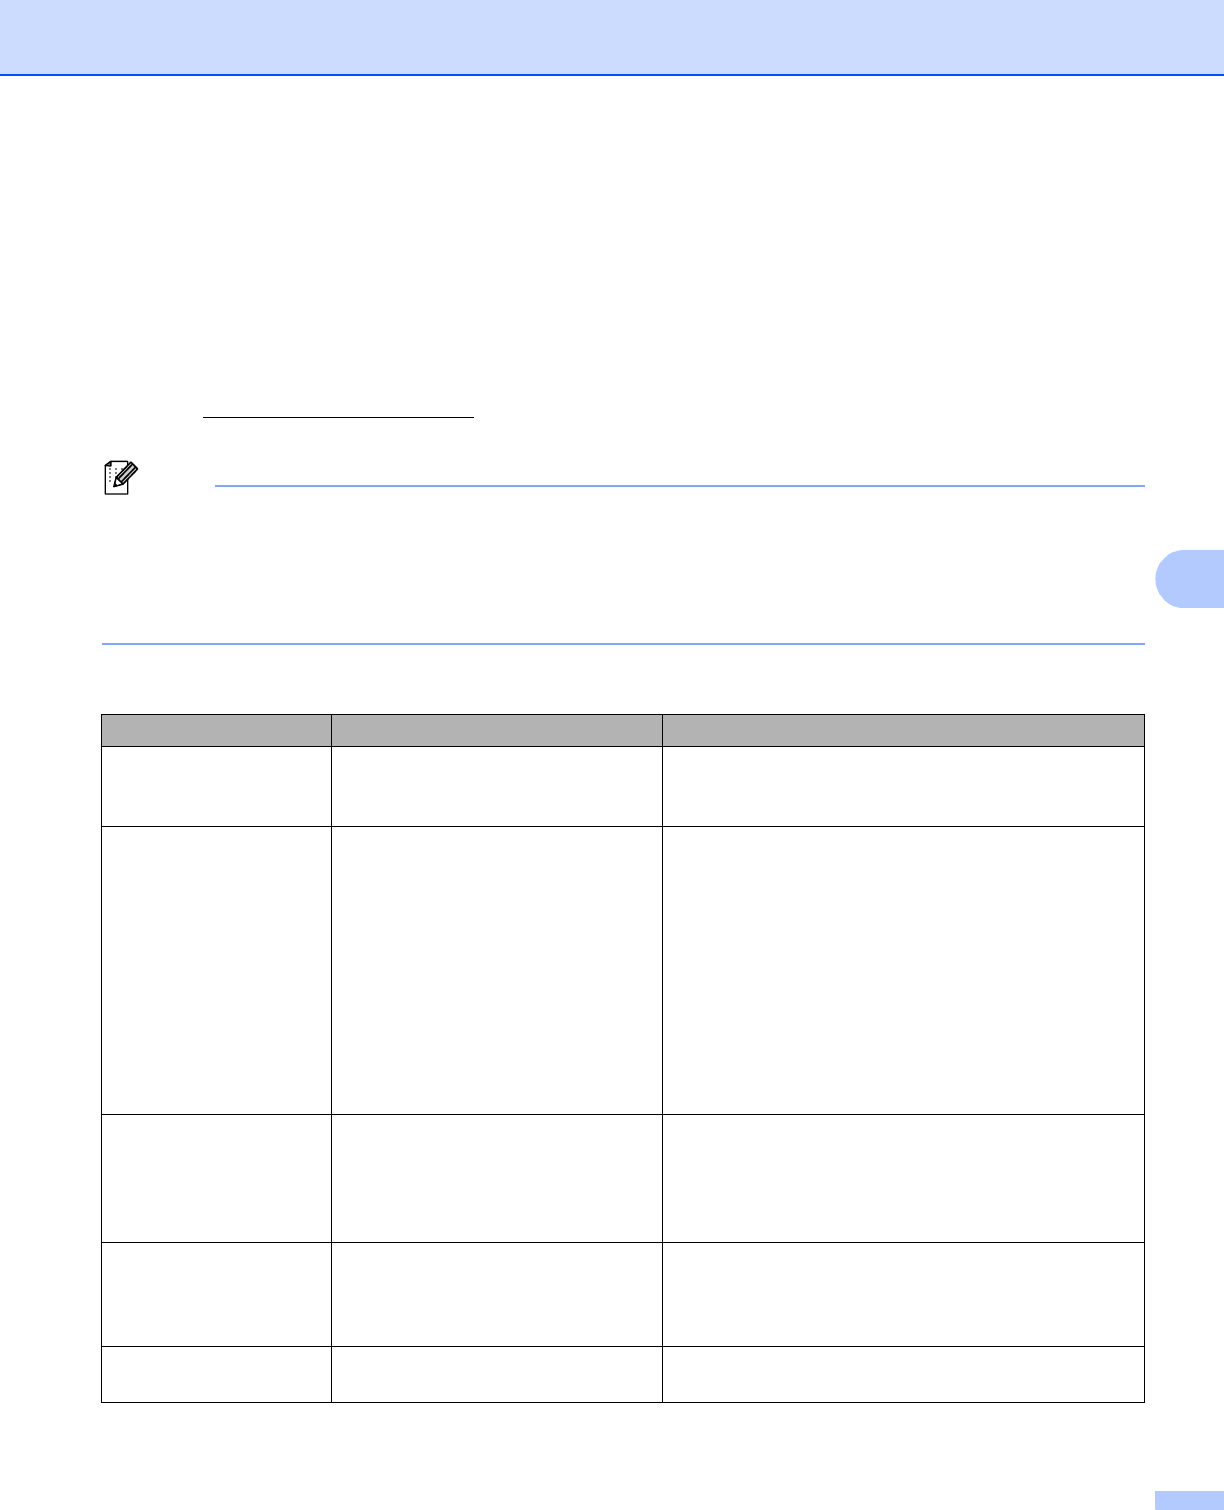
Error message Cause Action
Access Error The device is removed from the
USB direct interface while the data
is processing.
The USB device was removed while data was
processing. Press Cancel. Reinsert the USB device
and try to print with Direct Print.
Calibrate
<The second line of the
LCD>
Calibration
failed. See
Troubleshooting
chapter in User's
Guide.
Calibration failed. Turn off the machine. Wait a few seconds, then
turn it on again.
Put in a new drum unit. (See Replacing the drum
unit on page 101.)
Put in a new belt unit. (See Replacing the belt unit
on page 105.)
Put in a waste toner box. (See Replacing the
waste toner box on page 109.)
If the problem continues, call your dealer or
Brother Customer Service.
Cartridge Error The toner cartridge is not installed
correctly.
Pull out the drum unit. Take out the toner cartridge
indicated on the LCD and then correctly re-install it in
the drum unit. Put the drum unit back in the machine.
If the problem continues, call your dealer or Brother
customer Service.
Condensation One of the issues that can cause
this error is that condensation may
form inside the machine after a
room temperature change.
Leave the machine turned on. Wait for 30 minutes
with the front cover fully opened. Then turn off the
machine and close the cover. Turn it on again.
Cover is Open The cover indicated on the LCD is
not completely closed.
Close the cover that is indicated on the second line of
the LCD.


