


Installing the Driver & Software
12
STEP 2
Windows
®
USB
Windows
®
1
1
For USB Interface Cable Users (For Windows
®
2000
Professional/XP/XP Professional x64 Edition/Windows Vista
®
)
Important
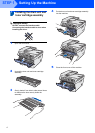
Make sure that you have finished the
instructions from step 1 Setting Up the
Machine on pages 4 through 10.
Note
• Please close any applications running before
installing the MFL-Pro Suite.
• The supplied CD-ROM includes ScanSoft™
PaperPort™ 11SE. This software supports
Windows
®
2000 (SP4 or greater), XP (SP2 or
greater), XP Professional x64 Edition and
Windows Vista
®
only. Please update to the latest
Windows
®
Service Pack before installing
MFL-Pro Suite.
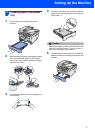
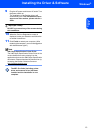
1 Turn off and unplug the machine from the AC
outlet and disconnect it from your computer, if
you already connected an interface cable.
2 Turn on your computer. (You must be logged
on with administrator rights.)
3 Put the supplied CD-ROM for Windows
®
into
your CD-ROM drive. Follow the on-screen
instructions.
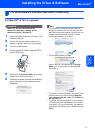
4 The CD-ROM main menu will appear. Click
Install MFL-Pro Suite.
5 After reading and accepting the ScanSoft™
PaperPort™ 11SE License Agreement, click
Yes.
The installation of ScanSoft™ PaperPort™
11SE will automatically start and is followed by
the installation of MFL-Pro Suite.
6 When the Brother MFL-Pro Suite Software
License Agreement window appears, click Yes
if you agree to the Software License
Agreement.
7 Choose Standard (MFC-7320) or Local
Connection (USB) (MFC-7440N), and then
click Next. The installation will continue.
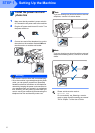
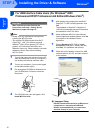
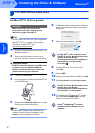
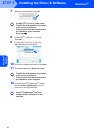
8 When this screen appears, connect the USB
interface cable to your PC, and then connect it
to the machine.
Improper Setup
DO NOT connect the machine to a USB port on
a keyboard or a non-powered USB hub.
Brother recommends that you connect the
machine directly to your computer.