6E122-26, 6E132-25, 6E123-26 and 6E133-25 User’s Guide 5-1
CHAPTER 5
LOCAL MANAGEMENT
This chapter explains how to set up a management terminal to access
6E12X-26 and 6E13X-25 Local Management. It also explains how to use
the Local Management screens and commands.
5.1 OVERVIEW
Local Management for the 6E12X-26 and 6E13X-25 consists of a series
of management screens that allow the management of the module, the
attached segments and the 6C105 chassis. The management screens allow
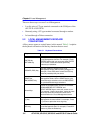
the user to perform the following tasks:
• Manage any interface module in the chassis via a connection to a
single interface module.
• Assign IP addresses and subnet masks to the 6E12X-26, 6E13X-25
and the 6C105 chassis.
• Control access to the 6E12X-26, 6E13X-25 and the 6C105 chassis by
establishing community names.
• Download a new image of operating software.
• Designate which Network Management Workstations receive SNMP
traps from the 6E12X-26, 6E13X-25 and the 6C105 chassis.
• Monitor the environmental status of the 6C105 chassis.
• View switch, interface, and RMON statistics.
• Assign ports to operate in standard or full duplex mode.
• Enable trunking of ports to perform load sharing.
• Configure the Fast Ethernet Interface Modules of the 6E12X-26 and
the HSIM of the 6E13X-25.
NOTE
The Local Management screens shown in this chapter are for
the 6E122-26. The 6E132-25, 6E133-25 and 6E123-26 share
most of the following Local Management screens. All Local
Management functions specific to any of the interface modules
are preceded by a Note to alert the reader.


