CHAPTER 2:
INSTALLATION
Page 2-4
BRIM-F6 User’s Guide
2.3.1 Installing a BRIM-F6 into a MIM
To install a BRIM-F6 in a Media Interface Module (MIM) that supports
BRIM technology (e.g., EMM-E6):
Note
: We recommend that you power down your hub even though
Cabletron MIMs have “hot swap” capabilities.
1. Power-down your MMAC hub.
2. Disconnect all cables from the module. Note each connection.
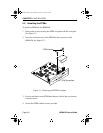
3. Unscrew the top and bottom knurled knobs of the MIM face plate.
4. Slide out the MIM, and place it on its side with the internal
components facing up.
5. Remove the BRIM coverplate screws and the BRIM coverplate.
Note:
The BRIM-F6 requires an additional 24 pin ribbon connection.
MIMs that support BRIMs provide one slot that supports this connection.
Install the BRIM-F6 in the BRIM slot with the ribbon cable jack.
6. Remove BRIM standoff screws.
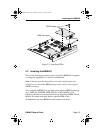
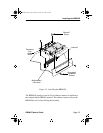
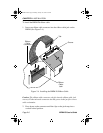
7. Place your BRIM behind the MIM faceplate. (See Figure 2-3.)
8. Insert the connector pins of the BRIM-F6 into the motherboard
connector on the MIM.
9. Press down firmly on the back of the BRIM until the pins slide all the
way into the connector holes.
Note:
Make sure that the standoffs align with the standoff screw holes.
10. Reinstall the faceplate mounting screws and standoff screws.
Note:
Faceplate and support post screws are provided both on the MIM
and in the BRIM package, for your convenience.
BRIM-F Book Page 4 Monday, January 29, 1996 9:26 AM


