8
Instruction Manual MSP-DUK9000
PROJECTOR INTERFACE PLATE
INSTALLATION PROCEDURES
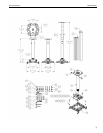
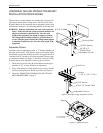
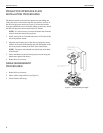
The bracket attaches to the universal projector mount lifting and
sliding the screws of the bracket into the slot and four vee slots of
the universal projector mount (see Figure 5). Secure the bracket
using provided thumb screws and route cabling as necessary. Install
the universal projector mount on the bracket as follows:
NOTE: It is not necessary to remove the thumb nuts from the
studs to install and remove the projector.
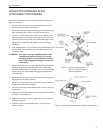
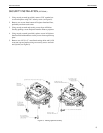
1. Install, loosely, the 10-24 thumb nuts on the 10-24 studs of the
universal projector mount.
2. Align the four locating slots of the universal projector mount
with the 10-24 studs of the bracket and slide the bracket on the
universal projector mount to the limit of the slotted holes.
NOTE: The tapers of the thumb nuts should seat in the holes
of the bracket.
3. Secure the Bracket to the universal projector mount using the
thumb nuts (tapered side down).
4. Route cables as necessary.
CABLE MANAGEMENT
PROCEDURES
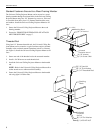
1. Route cables as necessary.
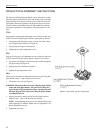
2. Secure cables using cable ties (see Figure 7).
3. Cut and install cable wrap.
Figure 7. Cable Routing Example


