


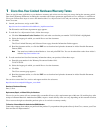


4
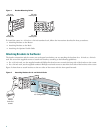
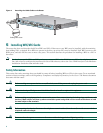
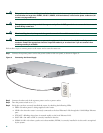
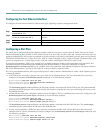
Figure 1 Bracket Mounting Points
To install the router in a 19-inch or a 24-inch standard rack, follow the instructions described in these procedures:
• Attaching Brackets to the Router
• Attaching Brackets to the Rack
• Attaching the Optional Cable Guide
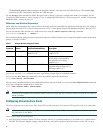
Attaching Brackets to the Router
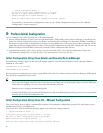
The bracket orientation and the screws you use depend on whether you are attaching the brackets for a 19-inch or a 24-inch
rack. Use two of the supplied screws to attach each bracket, according to the following guidelines:
• For a 19-inch rack, use the supplied number-8 Phillips flat-head screws to attach the long side of the bracket to the router.
• For a 24-inch rack, use the supplied number-8 Phillips truss-head screws to attach the short side of the bracket to the router.
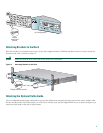
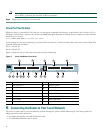
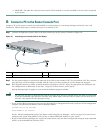
Figure 2 shows how to attach brackets to the two sides of the router with the front panel forward.
Figure 2 Attaching Brackets for 19- and 24-Inch Racks
38398
19" rack
mount point
19" rack
mount point
24" rack
mount point
24" rack
mount point
PVDM
0
O
K
OK
PW
R
1
0
SLOT 0
OK
PVDM 1
OK
M
OD
OK
1
0
SLOT 1
OK
Phillips
flat-head
screws
19" Configuration
60942