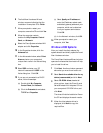
5
6
The Add New Hardware Wizard
window re-opens indicating that the
installation is complete. Click Finish.
7
When prompted to restart your
computer, remove the CD and click Yes.
8
When the computer restarts,
double-click My Computer, Control
Panel, and Network.
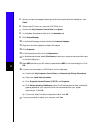
9
Select the Cisco Systems wireless LAN
adapter and click Properties.
10
In the Properties window, click the
Advanced tab.
11
In the Advanced window, select Client
Name and enter your computer’s
unique client name in the Value dialog
box.
12
Select SSID and enter your RF
network’s case-sensitive SSID in the
Value dialog box. Click OK.
13
If you are not connected to a DHCP
server, follow these steps:
(a) Double-click My Computer,
Control Panel, and Network.
(b) Click the Protocols tab and select
TCP/IP and Properties.
(c) Select Specify an IP address and
enter the IP address, subnet mask,
and default gateway address of your
computer, which can be obtained
from your system administrator.
Click OK.
(d) In the Network window, click OK.
14
When prompted to restart your
computer, click Yes.
Windows 2000 Systems
After you install the client adapter, the
system detects it and briefly opens the Found
New Hardware window.
The Found New Hardware Wizard window
opens and indicates that the wizard will help
you to install the driver.
1
Click Next. Another window opens and
asks what you want the wizard to do.
2
Select Search for a suitable driver for my
device (recommended) and click Next.
3
Select CD-ROM drives, deselect all
other options, insert the Cisco Aironet
Series Wireless LAN Adapters CD into
your computer’s CD-ROM drive, and
click Next.
The wizard finds the installation files on
the CD and displays the search results.
4
When the client adapter driver is
displayed, click Next to copy the
required files.


