


8
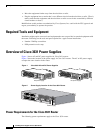
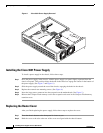
Installing Power Supplies in Cisco 3631 Routers
78-13818-03
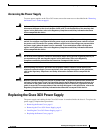
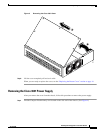
Replacing the Cisco 3631 Power Supply
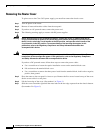
Removing the Router Cover
To gain access to the Cisco 3631 power supply, you must first remove the chassis cover:
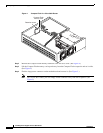
Step 1 Turn off power to the router.
Step 2 Remove all network interface cables from the rear panel.
Step 3 If you have an AC-powered router, remove the power cord.
Step 4 The following warnings apply to routers with DC power supplies:
Warning
Before performing any of the following procedures, ensure that power is removed from the DC
circuit. To ensure that all power is OFF, locate the circuit breaker on the panel board that services
the DC circuit, switch the circuit breaker to the OFF position, and tape the switch handle of the
circuit breaker in the OFF position. To see translations of the warnings that appear in this
publication, refer to the Regulatory Compliance and Safety Information document that
accompanied this device.
Warning
When installing the unit, always make the ground connection first and disconnect it last. To see
translations of the warnings that appear in this publication, refer to the Regulatory Compliance
and Safety Information document that accompanied this device.
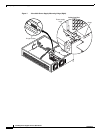
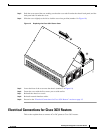
If you have a DC-powered router, follow these steps to remove the power cables:
a. Use a screwdriver to loosen the captive installation screws on the terminal block cover.
b. Lift and remove the terminal block cover.
c. Use a screwdriver to remove the three power leads from the terminal block, in this order: negative,
positive, then ground.
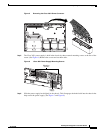
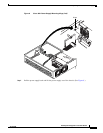
Step 5 Place the router so the rear panel is closest to you. Remove the five screws located on top of the cover.
Set the screws aside in a safe place.
Step 6 Lift the front edge of the cover. (See number 1 in Figure 3.)
Step 7 Slide the cover toward the right until the metal tabs on the rear edge separate from the chassis bottom.
(See number 2 in Figure 3.)