


Chapter 4 Removing and Replacing FRUs
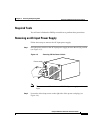
Removing and Replacing the Power Supply
4-8
Catalyst 4500 Series Switches Installation Guide
78-14409-08
Installing an AC-Input Power Supply
Warning
The plug-socket combination must be accessible at all times, because it serves
as the main disconnecting device.
Statement 1019
Follow these steps to install an AC-input power supply:
Step 1 Make sure that the power supply you are installing is not plugged in to a power
outlet and that the power cord is not connected to the power supply.
Step 2 Remove the two Phillips-head screws from the power supply filler plate (if a filler
plate is present).
Step 3 Remove the power supply filler plate (if one is present) and set it aside.
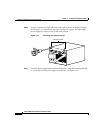
Caution Use both hands to grasp a power supply.
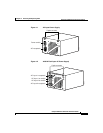
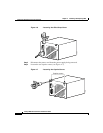
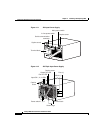
Step 4 Grasp the power supply handle with one hand. Place your other hand underneath
to support the bottom of the power supply, as shown earlier in Figure 4-8.
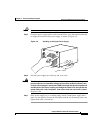
Step 5 Slide the power supply all the way into the power supply bay.
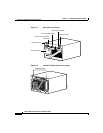
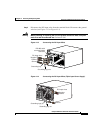
Step 6 Using a screwdriver, tighten the two captive installation screws (see Figure 4-1)
on the front panel of the AC-input power supply.
Step 7 Make sure the power supply power switch is in the off position (O).
Step 8 Before you connect the power supply to a power source, ensure that all site power
and grounding requirements described in the Site Preparation and Safety Guide
have been met.
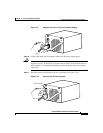
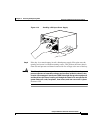
Step 9 Plug the power cord into the power supply (see Figure 4-9).