Linux Installation and Configuration Guide for AlphaServer 48
ECG513/0100
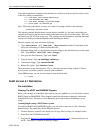
the floppy or CD-ROM. You should now be at the SRM prompt, "P00>>>". Enter the following
commands to finalize the configuration.
You need to enter these commands, such that the drive reference on the second line needs to refer
to the drive which you installed to:
P00>>>set boot_file 2/boot/vmlinux.gz
P00>>>set bootdef_dev dka0
P00>>>set boot_osflags "root=/dev/sda2"
P00>>>boot dva0 -fi vmlinux.gz
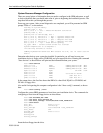
Note - When the system boots, you may see a series of warnings similar to the following:
system.map - incorrect version
This warning indicates that the kernel version that you installed (i.e. the latest version that you
copied from Compaq's ftp site) was not built at the same time as the rest of the kernel. This will
not impact your use of Linux in any way. This warning can be eliminated by installing the kernel
sources, all currently recommended patches and rebuilding the kernel.
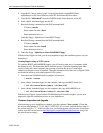
Once the system is up, login and do the following:
1. Type: swriteboot -f1 /dev/TdZ /boot/bootlx (where T is the type of
drive, s for SCSI or h for IDE; and Z is the letter of the drive you are booting; ex: dka0=sda,
dqa0=hda)
2. Type: mkswap /dev/TdZW (where T is the type of drive, s for SCSI or h for IDE; Z is the
letter of the drive you are booting; ex: dka0=sda, dqa0=hda); and W is the swap partition
number (I.e. mkswap /dev/sda3 or mkswap /dev/hda3.) This is required to work around a
problem of the swap.
3. Mount the floppy disk to copy the kernel from the floppy to the /boot/ directory on the system
disk. Type: mount /dev/fd0 /floppy
4. Now go to the /boot directory. Type: cd /boot
5. Copy the kernel. Type: cp /floppy/vmlinux.gz .
6. Unmount the floppy. Type: umount /dev/fd0
7. Type: shutdown -h now
The system may or may not hang here. This is a known issue and is being worked on. Please
reset or power cycled the system to continue with installation.
At the SRM prompt, you can now boot directly from the hard drive:
P00>>>boot
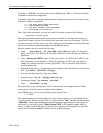
The system should now boot and prompt you to login. Upon logging in, you will probably want
to configure the X Window System. To do so, login as the user "root", and then run the command
"xf86config". Following the prompts answering the questions appropriately for your system. In
most cases, you will need to select "3Dlabs Oxygen GMX" as the graphics adapter, which is
usually configured with 8192K bytes of memory. Once this process is completed, you should be
able to run the command "startx" to make use of the graphical interface.


