


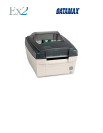

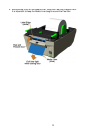

5
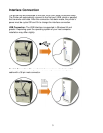
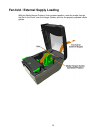
Ethernet Setup
The printer must be assigned and IP address in order to communicate withe the host/network.
This can be accomplished using several methods:
• Automatically obtain an IP via a DHCP Server
• Using the Printer Configuration Utility (DMXConfig) to set IP values
• Using the default IP, configure settings via the printer's internal web pages
Automatically Obtain an IP via a DHCP Server
The printer is factory configured to "DHCP Enabled". When the printer is powered on it will
search for a DHCP server, if found, the server will assign an IP address to the printer.
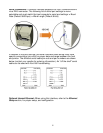
Connect the network cable to the printer and power on the printer. Allow 90 seconds (from
power up) for the printer to retrieve an IP address from the server. After this time, print a
Configuration Label to verify the printers current network settings.
To print the Configuration Label:
1. Be sure the printer is properly loaded with media (at least 2 inches wide), and that the
power to the printer is off.
2. Apply power to the printer, once the Status light is on press and hold the Control
Button.
3. Continue to hold the Control Button until the Configuration Label starts to print.
Note: After the printer has completed printing the Configuration Label the printer will
enter Hex Dump Mode. To exit Hex Dump Mode simply remove power from the
printer or perform a 'Printer Reset' by holding the Control Button for at least 10
seconds, then releasing.