


Back to Contents Page
Optical Drive
Dell™Latitude™131L/
DellVostro™1000ServiceManual
Removing an Optical Drive
Replacing an Optical Drive
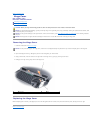
Your computer ships with a fixed optical drive installed.
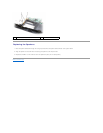
Removing an Optical Drive
1. Follow the instructions in Before You Begin.
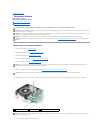
2. On the bottom of the computer, remove the M2.5 x 8-mm device security screw labeled with a lock icon ( ).
3. Insert a screwdriver into the indentation for the device security screw, and push the notch on the metal tab toward the media bay to release the optical
drive from the media bay.
4. Pull the drive out of the media bay.
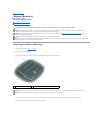
Replacing an Optical Drive
1. Slide the optical drive into the media bay.
2. Replace the device security screw next to the lock icon ( ).
Back to Contents Page
CAUTION: Before you begin any of the procedures in this section, follow the safety instructions in the ProductInformationGuide.
NOTICE: To help prevent damage to drives, store them in a safe, dry place when they are not installed in the computer. Avoid pressing down on them
or placing heavy objects on top of them.
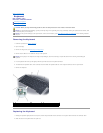
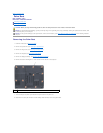
1
optical drive in media bay
2
indentation for M2.5 x 8-mm device security screw
3
notch