


Back to Contents Page
I/O Panel
Dell™Vostro™420/220/220sServiceManual
Removing the I/O Panel
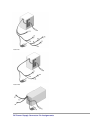
Replacing the I/O Panel
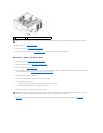
Removing the I/O Panel
1. Follow the procedures in Before Working on Your Computer.
2. Remove the computer cover (see Removing the Computer Cover).
3. Remove the bezel (see Removing the Bezel).
4. Disconnect the I/O panel cables from the system board.
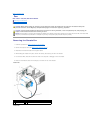
5. For the Vostro 220s:
a. Remove the chassis support bracket (see Removing the Chassis Support Bracket).
b. Remove any hard drives from the hard drive cage (see Removing a Hard Drive).
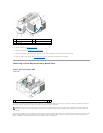
6. Disengage the cables from the metal clip(s), if present, that secure(s) the cables along the inside of the chassis.
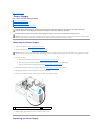
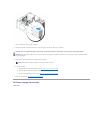
7. Remove the screw that secures the I/O panel to the front panel.
8. Ease the I/O panel away from the computer as you guide the cables through the bays, holes, and front-panel opening.
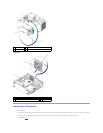
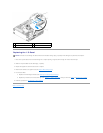
Vostro 420
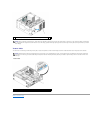
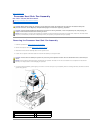
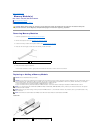
Vostro 220s
CAUTION: Before working inside your computer, read the safety information that shipped with your computer. For additional safety best
practices information, see the Regulatory Compliance Homepage at www.dell.com/regulatory_compliance.
CAUTION: To guard against electrical shock, always unplug your computer from the electrical outlet before removing the cover.
NOTICE: The procedure for removing and replacing the I/O panel is identical (except where noted) for the Vostro 420, Vostro 220, and Vostro 220s
computers; the illustrations provided are for example only and may not represent your particular computer precisely.
NOTE: Note the routing of all cables as you remove them so that you can reroute them correctly when installing the new I/O panel.
NOTICE: When sliding the I/O panel out of the computer, guide the cables carefully through the bays, holes, and front-panel opening to prevent
damage to the cable connectors and the cable routing clip(s) (if present).
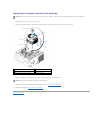
1
front-panel opening
2
I/O panel and cables
3
screw