


Back to Contents Page
Microprocessor Airflow Shroud — DellPrecision™450Computer
DellPrecision™Workstation650andDellPrecisionWorkstation450ServiceManual
Removing the Microprocessor Airflow Shroud
Installing the Microprocessor Airflow Shroud
Removing the Microprocessor Airflow Shroud
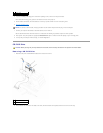
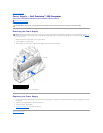
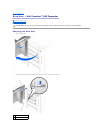
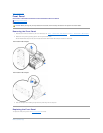
1. Press the shroud release lever towards the front of the computer and lift the shroud up to disengage the anchors.
2. Once the shroud has been disengaged from the anchors, unplug the fan cables from their connectors on the system board.
Installing the Microprocessor Airflow Shroud
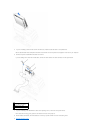
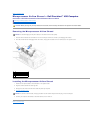
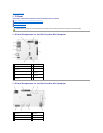
1. Attach both fan power cables to the connectors on the system board.
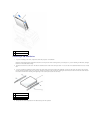
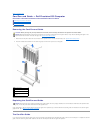
2. Align the anchor tabs with the securing slots.
3. Gently press the shroud until the anchor tabs snap securely into place.
4. Close the computer cover.
5. Connect your computer and devices to electrical outlets, and turn them on.
Back to Contents Page
CAUTION: Before you begin any of the procedures in this section, follow the safety instructions in the System Information Guide.
NOTICE: To avoid damaging the fan power cables, do not slide the shroud too quickly.
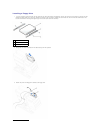
1
shroud release lever
2
anchor tabs
3
anchor slots
NOTICE: To connect a network cable, first plug the cable into the network wall jack and then plug it into the computer.