


Adding a Memory Module
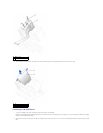
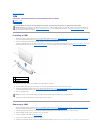
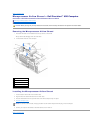
1. Press out the securing clip at each end of the memory module connector.
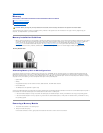
2. Align the notch on the bottom of the module with the crossbar in the connector.
3. Insert the module into the connector, ensuring that it fits into the guides at each end of the connector. Carefully press each end of the module into
place.
The memory module socket has alignment keys that allow the memory module to be installed in the socket only one way.
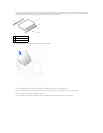
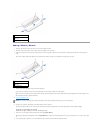
4. Pull up on the securing clips to lock the modules into place.
If you insert the module correctly, the securing clips snap into the cutouts at each end of the module.
When the memory module is properly seated in the socket, the securing clips on the memory module socket should align with the securing clips on the
other sockets with memory modules installed.
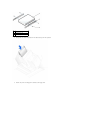
5. Close the computer cover.
6. Connect your computer and devices to electrical outlets, and turn them on.
The computer detects that the new memory does not match the existing configuration information and generates the following message:
The amount of system memory has changed.
Strike the F1 key to continue, F2 to run the setup utility
7. Press <F2> to enter system setup and check the value for System Memory.
The computer should have changed the value of System Memory to reflect the newly installed memory. Verify the new total. If it is correct, skip to step
10.
8. If the memory total is incorrect, turn off and disconnect your computer and devices from electrical outlets.
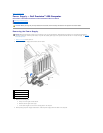
1
notch
2
memory module securing
clips (2)
3
alignment keys
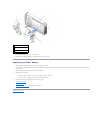
1
notch
2
memory module securing
clips (2)
3
alignment keys
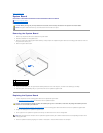
NOTICE: To connect a network cable, first plug the cable into the network wall jack and then plug it into the computer.