


27
Installation
|
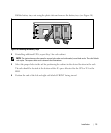
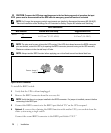
NOTE: A separate contact must simultaneously cause UPS input AC power to be removed.
5 Connect the switch or circuit to the REPO connector on the UPS rear panel using insulated
0.75 mm
2
–0.5 mm
2
(18–20 AWG) wire.
Optional. If you are daisy-chaining the REPO function with another UPS, connect the REPO port
labeled “OUT” to the REPO port labeled “IN” on the next UPS. Continue for each UPS. On the
last UPS in the daisy-chain, connect a REPO connector (without a jumper) in the REPO port
labeled “OUT.”
6 Verify that the externally-connected REPO switch is not activated to enable power to the UPS
output receptacles.
7 For hardwired models, continue to the following section, “Hardwiring the UPS Input.” Otherwise,
continue to “UPS Initial Startup” on page 29.
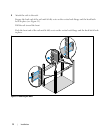
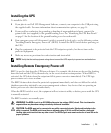
Hardwiring the UPS Input
WARNING: Only qualified service personnel (such as a licensed electrician) shall perform the electrical
installation. Risk of electrical shock.
The Dell Online Rack hardwired models require a dedicated branch circuit that meets the following
requirements:
S 250V/30A, 2-pole circuit breaker (25A for 3750W/230V UPS models) to provide short circuit and
overcurrent protection
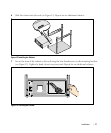
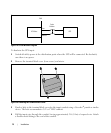
S The protection device requires a two-pole disconnection device between the UPS output and the
load (see Figure 19)
S The breaker must be wall-mounted and be readily accessible to the operator
S For Europe, the breaker must meet the IEC/EN 60934 standard and have a contact air gap of at
least 3 mm
S 200–240 Vac
S Single-phase (4200W/208V model is split-phase)
S 50/60 Hz
S Flexible metal conduit (recommended for ease of service and maintenance)