


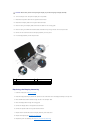
Replacing the AC-Adapter Connector
1. Follow the instructions in Before You Begin.
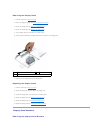
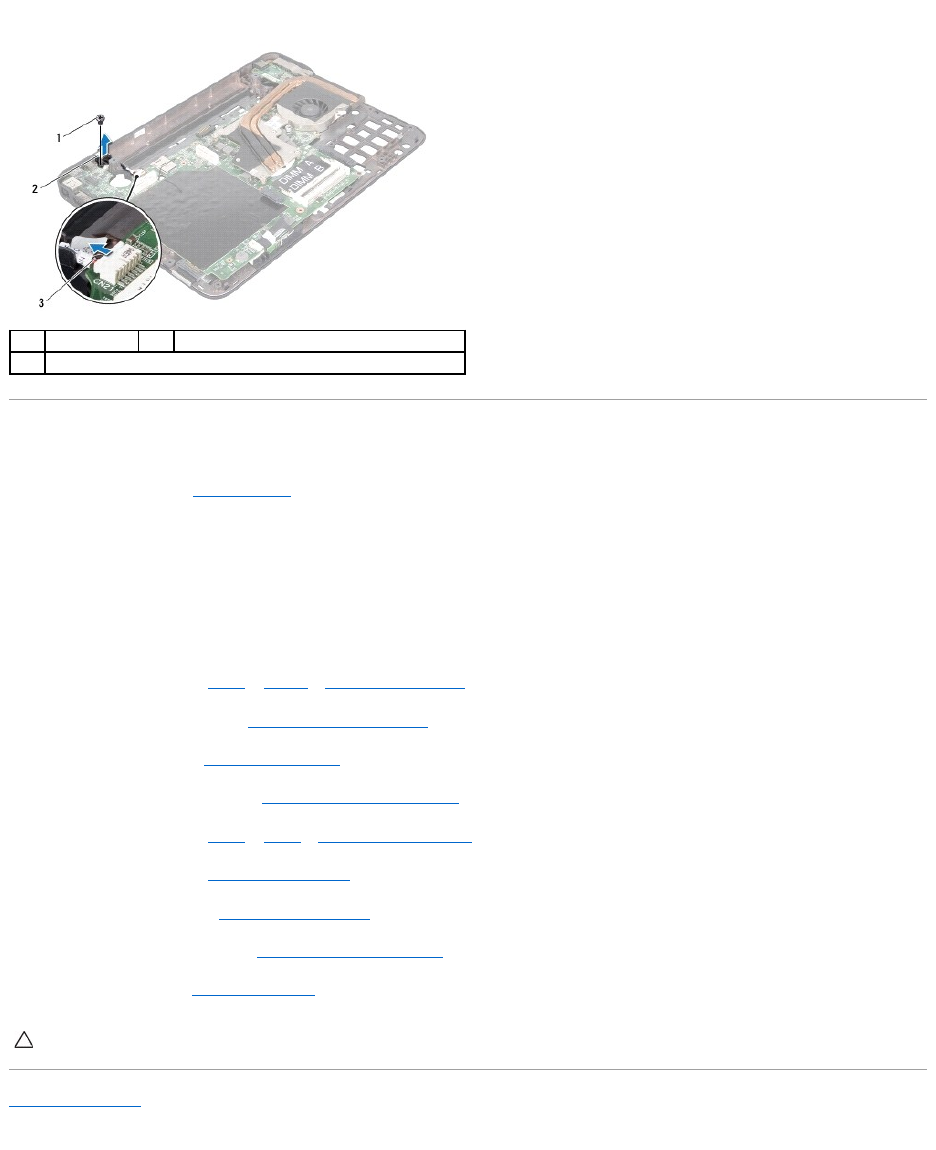
2. Align the screw hole on the AC-adapter connector with the screw hole on the top cover.
3. Replace the screw that secures the AC-adapter connector to the top cover.
4. Route the AC-adapter connector cable through the routing guide.
5. Connect the AC-adapter connector cable to the system-board connector.
6. Follow the instructions from step 9 to step 11 in Replacing the Top Cover.
7. Replace the display assembly (see Replacing the Display Assembly).
8. Replace the keyboard (see Replacing the Keyboard).
9. Replace the palm-rest assembly (see Replacing the Palm-Rest Assembly).
10. Follow the instructions from step 5 to step 6 in Replacing the Optical Drive.
11. Replace the hard drive (see Replacing the Hard Drive).
12. Replace the Mini-Card(s) (see Replacing the Mini-Card(s)).
13. Replace the memory module(s) (see Replacing the Memory Module(s)).
14. Replace the battery (see Replacing the Battery).
Back to Contents Page
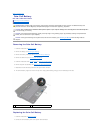
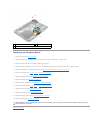
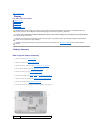
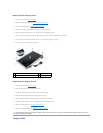
1
screw
2
AC adapter connector
3
AC-adapter connector cable
CAUTION: Before turning on the computer, replace all screws and ensure that no stray screws remain inside the computer. Failure to do so may
result in damage to the computer.