


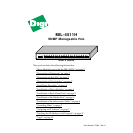
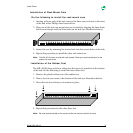

Install Guide
Model: MIL-4511H 8
Setting the IP Address with Telnet
The following only works if the MIL-4511H is on the same subnet as the host from
which you want to telnet. In this example, you are to add a MIL-4511H called
alpha
with an IP address
192.185.2.3
and an Ethernet address of
0040c800012B
.
To set the IP Address using Telnet:
1. Use a text editor to open the /etc/hosts file.
2. Add the following line and save the file:
192.185.2.3 alpha
3. Use this to set the static ARP entry for a host on the same subnet as the 4511H:
arp -s alpha 00:40:c8:00:01:2B
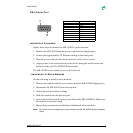
4. Set the rear panel DIP switches D2 up and D1 down and power cycle the unit.
5. Make a telnet connection to maintenance port 2002:
telnet alpha 2002, or connect an ANSI compatible terminal to the RS-232 port
6. Type [!] to enter the monitor menu.
7. If prompted with a message like
Warning: Entering monitor will lock out
other Ethernet access and force reset
, type [Y] to get the command prompt.
8. Type [N] to enter the network protocols menu.
9. Type [T] to enter the TCP/IP menu.
10. Change the settings for the TCP/IP engine options as prompted.
11. Return to the main menu and reboot the MIL-4511H with the [R] command.
Note:
On IBM RS-6000 systems, use the following command instead of the command given in
step 3 to specify that the connection is Ethernet II:
arp -s ether alpha 0:40:c8:0:01:2B
On AT&T Star servers and NCR systems, use this command:
arpbypass set alpha 0x00.0x40.0xc8.0x00.0x01.0x2B
On Windows 95/98 or NT with TCP/IP systems, use this command:
arp -s alpha 00-40-C8-00-01-2B
The MIL-4511H is now configured on the network.