


10/100 Auto Negotiation Switch User’s Guide
Managing the DES-3216
49
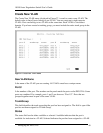
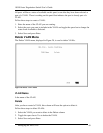
All ports will have a status of available on this panel, even after they have been selected as
part of a VLAN. There is nothing on this panel that indicates the port is already part of a
VLAN.
Follow these steps to create a VLAN:
1. Enter the name of the VLAN you are creating.
2. Select the ports you want to include in the VLAN and toggle the space bar to change the
status from Available to Selected.
3. Select Save and press Enter.
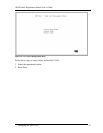
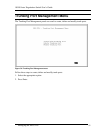
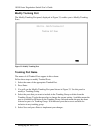
Delete VLAN Menu
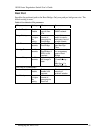
The Delete VLAN menu, displayed in Figure 28, is used to delete VLANs.
Figure 28: Delete VLAN menu
VLAN Name
Is the name of the VLAN.
Delete
After you have created a VLAN, this column will have the option to delete it.
Follow these steps to delete VLANs:
1. Select the VLAN you want to delete in the Delete column.
2. Toggle the space bar to Yes to delete the VLAN.
3. Select Save and press Enter.