


9
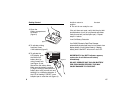
Selecting which fields to print
1. Press the PRINT SELECT button for 2
seconds, the DATE field will start flashing
2. By pressing the SET/EDIT button you can
turn the rectangle surrounding the DATE field
on or off. If you wish to print the date, make
sure the rectangle is on.
3. To move on to the next field press the
PRINT SELECT button, and repeat instruction
2 for each subsequent field.
4. Your DYMO Electronic Date/Time Stamper
can print any combination of the following
items:
• Date, Time, Message [IN, OUT, PAID,
REF, CFMD, RCVD] To select a different
message, press the SHIFT key while in
normal display.
OR • 4-digit counter + any of the two fields
above
(4-digit counter will count up only)
OR • 6-digit counter + one of the fields above
(6-digit counter will count up or down)
OR • 4 or 6-digit counter alone.
5. Once you have selected your stamping
Stamper will emit a series of short
beeps. To shut off the alarm, press
ALARM MODE.
Deactivating the alarm
1. Press ALARM MODE, then press LOCK so
the "bell" icon will disappear.
2. Press ALARM MODE to return to normal
display
.
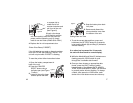
Using the Security Code
Setting the Security Code
1. Press and hold the Security Code button for 2
seconds.
2. Press LOCK to set the first digit, then SHIFT
to move on to the next digit. Repeat this step
until all digits are set.
3. Press SECURITY CODE to return to normal
display. A "key" icon will appear, locking the
code in.
Disabling the Security Code
12