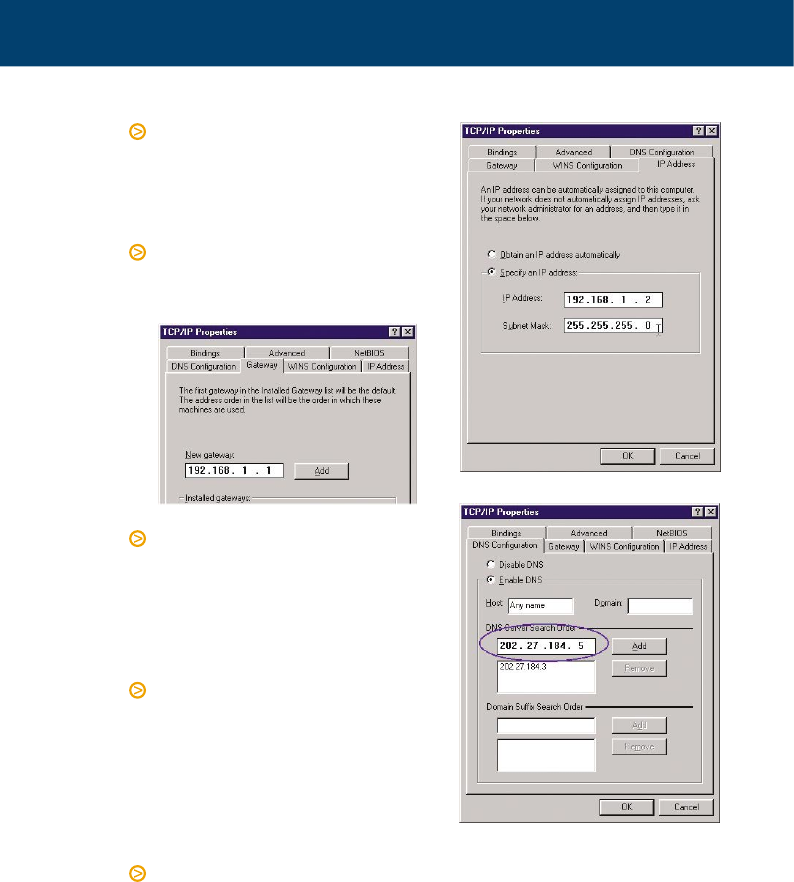
Select DNS Configuration tab, click
Enable DNS. Type in any name for
host. Enter your ISP’s DNS address.
Click Add. A second DNS address
(if specified) can be added in a
similar way.
If you are unsure what your ISP’s
DNS address is, you may pick one
of the following addresses until
your ISP’s DNS is known:
150.199.1.11
128.206.2.252
131.151.254.243
Click OK & then OK to finish. System
may ask for the Windows CDROM
and then will ask to restart. Answer
Yes to restart the computer.
Select IP Address tab. Specify
192.168.1.x (x is any number of your
choice between 2 and 254). This is the
IP address assigned to your computer.
Subnet Mask is 255.255.255.0.
Select Gateway tab. Enter the router’s
IP address 192.168.1.1.
Click Add
ADSL Router Quick Set-up Guide


