STEP 5 SAVE CONFIGURATION AND CHECK IF THE ROUTER IS ONLINE
Go to Tool > Save Configuration. Click on Save. Next go to Tool > Reset Router.
Make sure the "Reset to factory default settings" box is NOT ticked. Click
Restart.
CAUTION - if you reset to factory default the configuration for New Zealand
and everything you entered will be lost. It is then necessary to follow Section
5 of this Guide to reconfigure the router.
When the router restarts the DSL light on the front panel turns solid, normally
within one minute. This indicates the router has already established a link to
the telephone exchange and will authenticate using your Internet account
information. Subject to successful authentication you are online. The DSL
light blinks as data gets through.
If nothing happens return to Step 4. Scroll down to the bottom of the page
and click Connect to connect immediately. Soon after you should observe
data getting through.
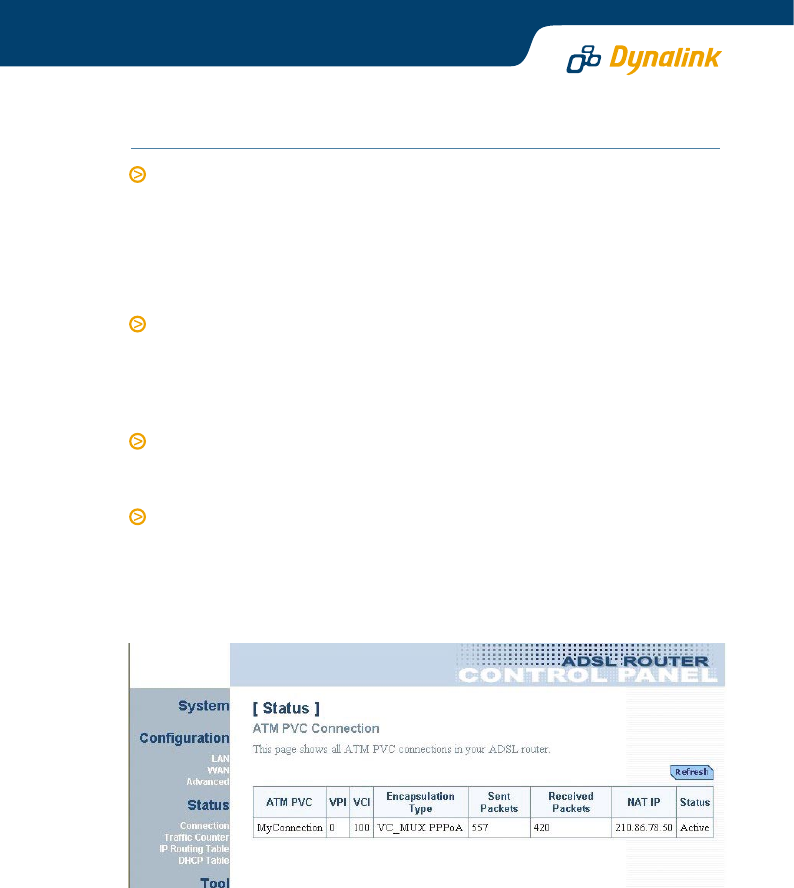
Any time you want to check that the router is online, go to Status > Connection
> ATMPVC. Under Status, it should show Active. The public IP assigned by
your ISP is displayed under NAT IP. The picture below shows the router has
been assigned 210.86.78.50. If you cannot go online see Q2 in Section 6 -
Troubleshooting.
