


Page 2
10/30/2001
Manual Part Number 900-00027-001
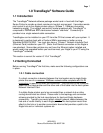
1.2.2 Eagle Network settings
You will need to choose an IP Address for your Eagle. If you are using a direct
connection to your PC, then we recommend that you use the default address of
192.168.2.3. If your Eagle already has this address, then you are ready to go
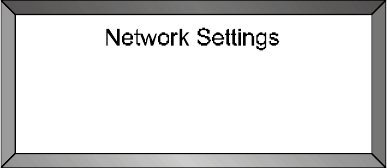
to 1.2.3. To check your Eagle’s current IP address, press Ctrl-W on the Eagle’s
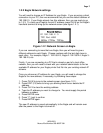
handheld terminal to bring up the network screen (see figure 1.2.1).
IP: 192 . 168 . 2 . 3
TPC Port: 4000
NICUp FTPUp TCPUp
Figure 1.2.1 Network Screen on Eagle
If you are connecting to more that one Eagle, then you will need to give a
different address to each Eagle. Choose numbers with the last digit close to
each other. For example, Eagle 1: 192.168.2.3, Eagle 2: 192.168.2.4, Eagle 3:
192.168.2.5, etc.
Finally, if you are connecting to a PC that is already a part of a local office
network, then you will need to check with your network administrator to find an
available IP address for your Eagle printer that fits into your existing network IP
scheme.
Once you choose an IP address for your Eagle, you will need to change the
Eagle to the new address, if necessary, by following these steps:
1. Press Ctrl-W to jump to the network screen (see figure 1.2.1).
2. Press EDIT (F4) twice to bring up a blinking block cursor beside the IP
address.
3. Press Ctrl-X to clear the existing address.
4. Type the IP address you want to change to. You must supply the period
between numbers.
5. Press ENTER once.
6. Press “Y” (yes) to confirm.
7. Press ENTER again.
The new IP address is saved automatically to the Eagle and will remain even
after the power to the Eagle is turned off.