XT-40 & IT-RSS Installation IM01005012E
Rev. 1 – 2/2007 Page 3
2 INSTALLATION
2.1 Before Installation
Perform or plan the following before installing the SPD:
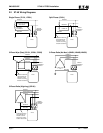
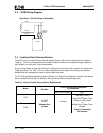
1. Locate your electrical system’s applicable wiring diagram in Sections 2.2 & 2.3
2. Verify that your electrical system’s voltage and wiring configuration matches that of the SPD as
shown on its label.
3. De-energize the SPD, and follow safe work practices to avoid an electrical shock hazard.
4. Ensure that a Neutral to Ground/Earth bond is present at the SPD. Note that the SPD may be
damaged if not connected to ground.
5. Measure the voltage between Neutral and Ground. If this voltage is greater than 5 Vac, then a
problem may exist in the electrical system. The SPD can still be installed under this condition, but
a licensed/qualified electrician should be consulted to correct the problem.
6. The SPD can be mounted in any position. If necessary, the cover may be rotated 180 degrees to
improve readability of the label. When removing the cover, be careful not to damage the indicator
light circuit board or wiring attached to the cover.
7. Isolated Ground: The SPD’s ground wire is internally bonded to its housing. If the electrical
system utilizes an isolated ground, then the SPD’s housing must also be isolated from ground
using insulated conduit fittings, and its ground wire must be connected to the system’s isolated
ground bus.
8. Plan to use weatherproof (corrosion resistant) conduit and fittings to maintain the enclosure’s
NEMA 4 (IP66) or 4X rating.
9. Plan to install the SPD as close as possible to the electrical panel. Long lead lengths and sharp
bends between the SPD and the panel will degrade the performance of the SPD.
10. Plan to install 30 A circuit interrupt devices as described in Section 2.4.


