Instructional Booklet
Page 8 Effective: June 2007
Instruction Manual for the Eaton RTC-50
Automatic Transfer Switch Controller
For more information visit: www.eaton.com IB00405004E-70-8664
SECTION 5: MAINTENANCE,
TROUBLESHOOTING, AND REPLACEMENT
5.1 Maintenance and Care
The RTC-50 is designed to be a self-contained and maintenance-
free unit. The printed circuit board is conformally coated at the
factory. The RTC-50 is intended for service by factory-trained
personnel only.
5.2 RTC-50 Controller Troubleshooting
The Troubleshooting Guide (Table 3) is intended for service per-
sonnel to identify whether a problem being observed is external or
internal to the unit. For assistance with this determination, con-
tact Eaton Electrical. If a problem is identified to be internal, the
unit should be returned to the factory for replacement.
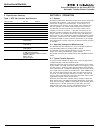
Table 3. Troubleshooting Guide.
5.3 Level of Repair
This manual is written with the assumption that only ATS trouble-
shooting will be performed. If the cause of malfunction is traced
to an RTC-50, the unit should be replaced with a new unit. The
malfunctioning unit should then be returned to Eaton Electrical for
factory repairs.
5.4 RTC-50 Replacement
Step 1: Turn the Generator Start select to “OFF” before attempt-
ing to replace the RTC-50 controller. Ensure all sources
of power are removed.
Step 2: Disconnect the J1, J2, J3, J4, and J6 plugs from the
controller
Step 3: Disconnect the wires connected to J7 and J8.
Step 4: Remove the four (4) screws located at the corners of the
controller that secure it to the power panel. Remove the
controller.
Step 5: Align the new controller with the mounting holes. Secure
the new controller board using the existing hardware.
Tighten the screws.
Step 6: Connect the J1, J2, J3, J4, and J6 plugs to their original
receptacles.
Step 7: Reconnect the wires to J7 and J8.
Step 8: Reapply power to the transfer switch.
Step 9: Place the generator control selector switch in the “AUTO”
position after the controller has been replaced. (The Gen-
erator may start but will shut down within 5 minutes.)
Test the system for proper functionality.
SYMPTOM PROBABLE CAUSE POSSIBLE SOLUTION(S)
“Util Avail” and “Gen Avail”
LEDs are not lit.
Power is deficient or absent.
RTC-50 is malfunctioning.
Verify that power is connected
at J1 – J4 and that it is within
specifications.
Replace the unit.
Utility source or Generator
source is not available when
it should be.
Voltage is not within setpoint
values.
Verify voltage with multimeter.
Check the programmed setpoint
values.
WARNING
HIGH VOLTAGES ARE PRESENT IN AND AROUND TRANSFER
SWITCH EQUIPMENT. BEFORE ATTEMPTING TO REPLACE ANY
COMPONENT, DISCONNECT THE LINE POWER FROM THE EQUIP-
MENT BEING SERVICED BY OPENING AND LOCKING OUT, IF POSSI-
BLE, THE NEXT HIGHEST DISCONNECT DEVICE. FAILURE TO
FOLLOW THIS PROCEDURE COULD CAUSE SEVERE PERSONAL
INJURY AND/OR DEATH.
ALWAYS TURN THE UTILITY POWER OFF AND TURN THE GENERA-
TOR CONTROL SELECTOR SWITCH TO THE “OFF” POSITION
BEFORE ATTEMPTING TO REPLACE ANY COMPONENTS.


