


Image Shape
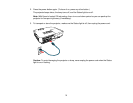
You can project an evenly rectangular image by placing the projector directly in front of the center of the
screen and keeping it level. If you place the projector at an angle to the screen, or tilted up or down, or off
to the side, you may need to correct the image shape for the best display quality.
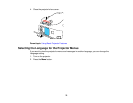
When you turn on automatic keystone correction in your projector's Settings menu, your projector
automatically corrects keystone effects when you reposition the projector.
Automatically Correcting Image Shape With Screen Fit
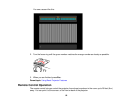
Correcting Image Shape with the Keystone Buttons
Correcting Image Shape with Quick Corner
Parent topic: Using Basic Projector Features
Automatically Correcting Image Shape With Screen Fit
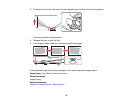
You can use the projector's Screen Fit feature to automatically correct the shape and position of images
to fit on your screen.
The projector's sensor can detect the screen size and shape in these conditions:
• Projector is not mounted on the ceiling
• Screen size is 100 inches (254 cm) or less
• Projection distance is about 4 feet (1.2 m) to 10 feet (3 m) (PowerLite 1970W/1975W)
• Projection distance is about 5 feet (1.5 m) to 10 feet (3 m) (PowerLite 1980WU/1985WU)
• Projection angle is about 20° right or left, or 30° up or down
• The room is not too dark
• The projection surface is not patterned and does not deflect the sensor in some way
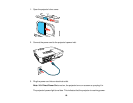
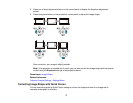
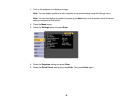
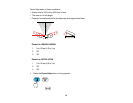
1. Press the Screen Fit button on the projector or remote control.
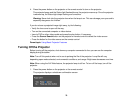
You see a message on the screen.
2. Move the projector as necessary to display the message in the middle of the screen.
3. Zoom into the image until its yellow frame extends beyond the edges of the screen.
4. Press the Screen Fit button again.
75