


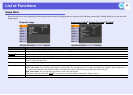

List of Functions
32
SNMPg You can make SNMP settings.
Trap IP Address 1/Trap IP Address 2: You can register up to two IP addresses for the SNMP trap notification destination.
The IP address registered in "Trap IP Address 2" is used when the IP address in "Trap IP Address 1" cannot be accessed.
To use SNMP to monitor the projector, you need to install the SNMP manager program on your computer. SNMP should be managed by a
network administrator.
Mail When this is set, you are notified by e-mail if a problem or warning occurs with the projector.
*2
Mail Notification: You can set whether to be notified by mail (On) or not (Off).
SMTP Server: You can input the IP address for the SMTP server for the projector.
*1
You can enter a number from 0 to 255 in each field of the address. However, the following IP addresses cannot be used.
127.x.x.x, 224.0.0.0 to 255.255.255.255 (where x is a number from 0 to 255)
Port Number: You can input the port number for the SMTP server.
*1
The initial value is 25. You can input numbers between 1 to 65535.
Destination Address 1/Destination Address 2/Destination Address 3: You can enter
*1
the destination mail address and the contents of the
message to receive notification when a problem or warning occurs. You can register up to three destinations. You can enter up to 32 single-byte
alphanumeric characters for the mail addresses.
Projector Name You can enter a name for the projector. When connected to a network, this name is used to identify the projector.
AMX Device
Discoveryg
When "On" is set, and the projector is connected to a network, it can be detected using AMX Device Discovery. Set "Off" when the projector is
not connected to AMX controller or a network that enables AMX Device Discovery to detect the projector.
Reset You can reset all adjustment values in the "Network" menu to their default settings.
To return all menu items to their default settings, see s p.35
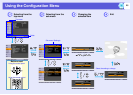
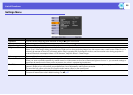
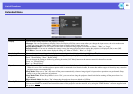
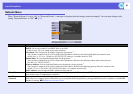
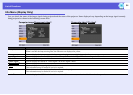
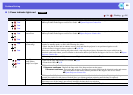
*1 When inputting numbers and passwords, the following software keyboard is displayed. Tilt the [u], [d], [l], and [r] buttons on the remote control to move the
cursor to the target key, and press the [Enter] button to input. After entering characters, press [Finish] on the keyboard to confirm your entry. Press [Cancel] on the
keyboard to cancel your input.
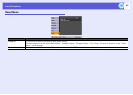
Sub Menu Function
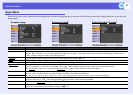
Each time this key is
selected, it sets and
changes between upper
case and lower case
letters.
Each time this key is
selected, it sets and
changes the symbol
keys for the section
enclosed by the frame.