


EPSON PowerLite 54c/74c Projector
10/03 EPSON PowerLite 54c/74c Projector - 3
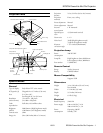
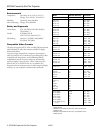
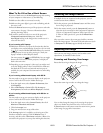
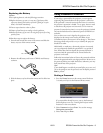
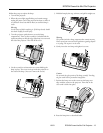
Computer/Component Video Port
Pin Assignments
The Computer 1/Component Video 1 and Computer 2/
Component Video 2 ports are female video RGB, 15-pin,
mini-D-style connectors.
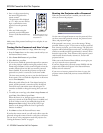
Positioning the Projector
Before connecting the projector, you need to decide where to
place it. The location you choose depends on the size of the
room and what you are projecting.
❏ Place the projector on a sturdy, level surface, between
2.9 and 34.4 feet from the screen.
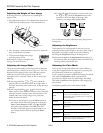
❏ Make sure there is plenty of space for ventilation around and
under the projector. Leave at least 8 inches between the
projector and a wall.
❏ Make sure the projector is within 6 feet of an electrical outlet
or extension cord and within 5 feet of your computer and/or
video source.
❏ Place the projector directly in front of the center of the
screen, facing the screen squarely. Otherwise, your image
will not be rectangular.
Note
It’s easier to position the projector when the screen is directly in
front of the room. If the screen is placed diagonally in a corner, it’s
much more difficult to aim the projector correctly at the screen and
get a rectangular image.
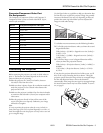
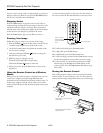
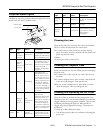
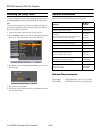
Use the figure below as a guideline to help you determine how
far from the screen to place the projector. Image size generally
increases with distance, but may vary depending on how you
position the zoom ring and whether you have adjusted the
image size with other settings.
To calculate exact measurements, use the following formulas:
❏ To find the projection distance when you know the screen’s
diagonal dimension:
Wide (inches) = ((3.0625
× diagonal screen size [inches]) –
2.4655) / 2.54
Tele (inches) = ((3.5063
× diagonal screen size [inches]) –
2.0063) / 2.54
❏ To find how large a screen’s diagonal dimension will be
when you know the projection distance:
Wide (inches) = (Projection distance [inches]
× 0.82937) +
0.80505
Tele (inches) = (Projection distance [inches]
× 0.7244) +
0.57219
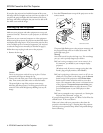
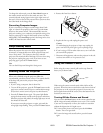
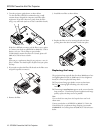
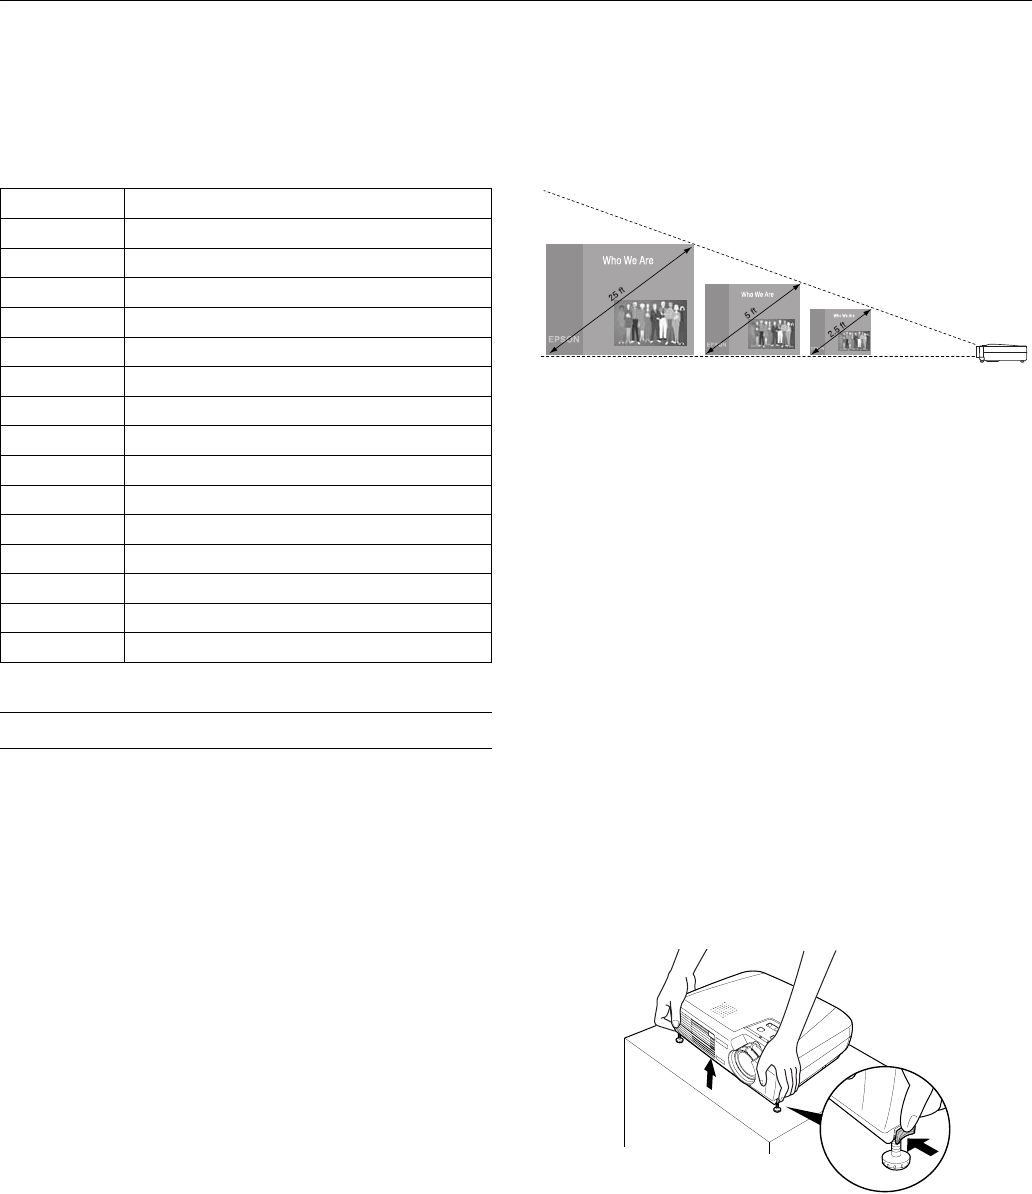
If you place the projector below the level of the screen, you’ll
have to tilt it up by extending the feet as shown. Tilting the
projector upward causes the image to lose its rectangular shape,
but the Auto Keystone feature corrects the distortion
automatically. If the image does not regain its rectangular shape,
the Auto Keystone feature may have been disabled. To turn it
on, see page 6.
Pin no. Computer/component video port
1 Red video
2 Green video
3 Blue video
4 GND
5 GND
6 Red GND
7 Green GND
8 Blue GND
9 Reserved
10 Synchronous GND
11 GND
12 SDA
13 Horizontal sync / composite sync
14 Vertical sync
15 SCL
30.1 to 34.4 feet 5.9 to 6.8 feet 2.9 to 3.4 feet