


Focusing and Positioning the Screen Image
69
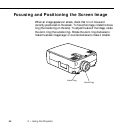
If you need to raise or lower the image on the screen, extend or retract
the two feet at the bottom of the projector as follows:
1. Stand behind the projector and support the front of it while you
lift up on the foot adjust levers, located above the feet. This
unlocks the adjustable feet so they can move up and down. Don’t
let the projector drop.
Caution: Don’t hold or lift the projector by its lens. This can damage
the lens.
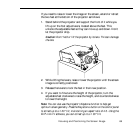
2. While lifting the levers, raise or lower the projector until the screen
image is correctly positioned.
3. Release the levers to lock the feet in their new position.
4. If you want to fine-tune the height of the projector, turn the
adjustable feet clockwise to raise the height, and counterclockwise
to lower the height.
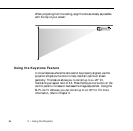
Note: You can also use the projector’s Keystone function to help get
optimum screen geometry. Press the Keystone button on the control panel
to correct up to a ± 20° tilt, maintaining an aspect ratio of 4:3. Using the
ELP Link IV software, you can correct up to a ± 30° tilt.