


Presenting from a Memory Card, Digital Camera, or External Drive 101
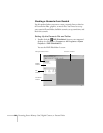
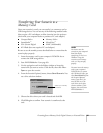
Transferring Your Scenario to a
Memory Card
Once your scenario is saved, you can transfer it to a memory card or
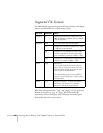
USB storage device. You can use any of the following standard cards.
Most require a PC card adapter to allow insertion into the projector
(check with your computer dealer to purchase a PC card adapter).
Be sure to use the transfer process described below to ensure that the
scenario plays properly:
1. Insert the memory card in your computer’s PCMCIA slot or
connect the USB storage device.
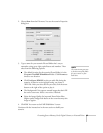
2. Start EMP SlideMaker 2 (see page 94).
3. Use the navigation tools in the folders window to locate the
scenario file you want to review. Click the file, then click
File >
Open
to open the scenario.
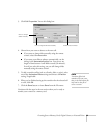
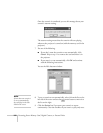
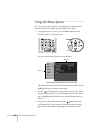
4. From the Scenario Option(s) menu, choose
Send Scenario. You
see a drive selection window:
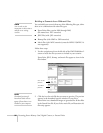
5. Choose the drive where your card is located and click
OK.
6. Click
OK again to confirm. Your scenario is transferred to the
card.
■ CompactFlash
™
■ Memory Stick
™
■ SmartMedia
™
■ MicroDrive
™
■ SD
™
(Secure Digital ■ MMC (Multimedia)
■ ATA flash (does not require a PC card adapter)
note
You have to save the
scenario on your computer’s
hard drive before
transferring it. Don’t use
Windows to copy the
scenario to your memory
card, or it may not play
properly.
You must insert the memory
card in your computer’s
PCMCIA slot (or connect
the USB device) before you
select
Send Scenario from
the Scenario Option(s)
menu. If you don’t, you
won’t be able to see the
card’s drive in the drive
selection window. If this
happens, close and restart
EMP SlideMaker 2.
Select your memory
card drive