


Epson Stylus CX6000 Series
6/06 15
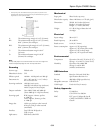
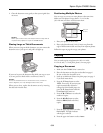
Checking the Ink Supply
To check your ink supply, do the following:
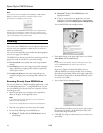
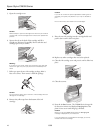
❏ Windows: Double-click the printer icon on your
taskbar (in the lower right corner of your screen). You see
a window like the following:
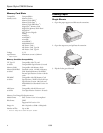
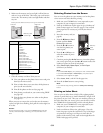
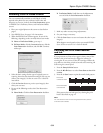
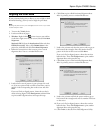
❏ Macintosh OS X: Open the
Applications folder and select
EPSON Printer Utility. Select CX6000 Series in the
printer list, click
OK, and select EPSON Status Monitor.
You see a window like this:
Removing and Installing Ink Cartridges
Make sure you have a new ink cartridge before you begin.
Once you start replacing a cartridge, you must complete all
the steps in one session.
Warning:
Keep ink cartridges out of the reach of children.
Be careful when you handle used ink cartridges; there may be ink
remaining around the ink supply port. If ink gets on your skin, wash
it off with soap and water. If it gets in your eyes, flush them
immediately with water.
Do not put your hand inside the CX6000 Series or touch any
cartridges during printing.
Caution:
Do not open ink cartridge packages until you are ready to install the
ink. Cartridges are vacuum packed to maintain reliability.
Install a new ink cartridge immediately after removing an expended
one. Leaving cartridges uninstalled can dehydrate the print head
and may prevent the CX6000 Series from printing.
Leave the expended cartridge installed until you have obtained a
replacement, or the ink remaining in the print head nozzles may dry
out. To ensure good results, use genuine Epson ink cartridges and
do not refill them. Other products may cause damage to your
CX6000 Series not covered by Epson’s warranty.
If you remove an ink cartridge for later use, protect the ink supply
area from dirt and dust and store it in the same environment as the
CX6000 Series. Note that there is a valve in the ink supply port,
making covers or plugs unnecessary, but care is needed to prevent
the ink from staining items that the cartridge touches. Do not touch
the ink cartridge ink supply port or surrounding area.
If you remove a low or expended ink cartridge, you cannot reinstall
and use the cartridge.
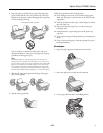
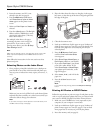
1. Make sure the CX6000 Series is on.
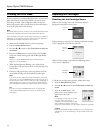
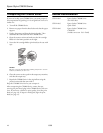
2. Make sure that the document cover is closed, then open the
scanner.
Caution:
Do not open the scanner when the document cover is open.
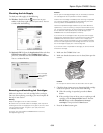
3. Check the photo viewer screen to determine which cartridge
needs to be replaced. Then do one of the following:
❏ If the ink cartridge is expended, press the x
Start
button.
❏ If the cartridge is low on ink or you are replacing an old
cartridge, press the
Setup/Utilities button. Press the
l
or r button to select Press Start to change
cartridges. Then press the x Start button.
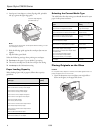
4. Press the x
Start button again.
Click a cartridge
image to display
information
about it.