If you have a brand new printer, follow the Epson instructions for setting up your printer. Use the Epson injectors
that came with the printer. Follow normal installation instructions for the software. Test the printer by printing
pictures. Learn how to use the Epson utilities to run a Nozzle pattern check and to run a Cleaning Cycle.
Make sure that the printer can produce a perfect nozzle pattern
before proceeding with Eco-Flo installation.
If you have been using the printer in the past, just make sure it produces a perfect nozzle pattern before proceeding
with the Eco-Flo installation. If the Nozzle pattern has any gaps whatsoever, then run cleaning cycles until it prints
perfectly.
DO NOT INSTALL THE ECO-FLO IF YOUR PRINTER IS NOT FULLY FUNCTIONAL
Disconnecting Power From the Printer
Push, but do not hold the INK button on the printer. This will move the injectors to the “replacement” position. After
they move to this position, which is just slightly to the left of the parked position, SWITCH OFF THE POWER AT
THE WALL SOCKET. Now the injector head can be moved from side to side by hand. We will tell you later when
to reconnect the printer power supply. Remove the original Epson injectors from the printer (Power is disconnected).
Set them aside on some paper towel. DONOT throw away, you may need them someday. Wrap in a zip-lock plastic
bag for cool dry safe keeping.
____________________________________________________________________________________________
INSTALLATION OF YOUR ECO-FLO KIT
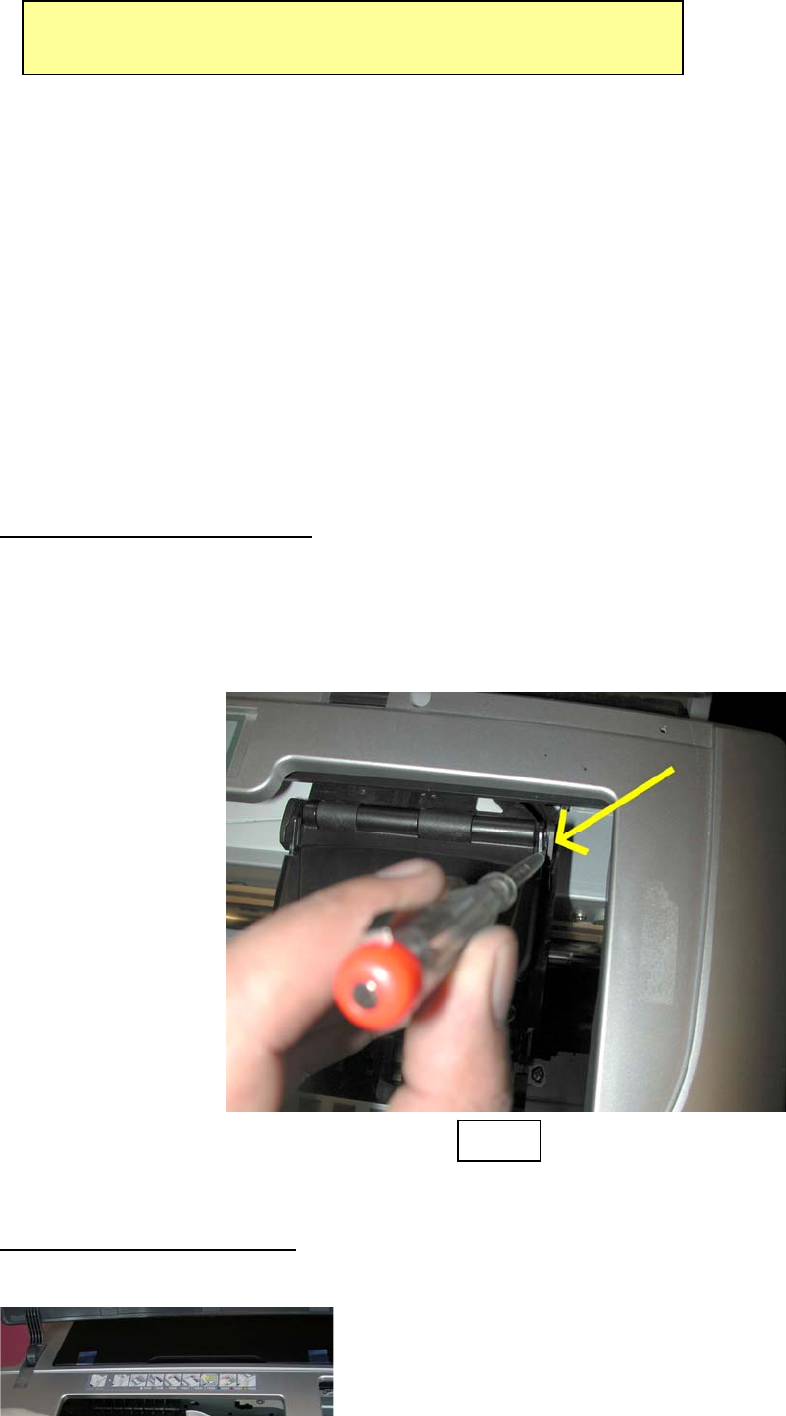
Step 1 Removing the Injector Lid
You will need to remove the printer lid on the injector carrier as shown in this photo. Store this somewhere
safe should you ever wish to return the printer to it’s original setup. It is held in place by two ‘Lugs’ on either
side. Once you have one side disconnected, you will find it easy to slide out the lid.
Use a fine screw driver to do this and push one of the lugs into the direction of the print head and from one
side only as indicated below.
Fig.1
Step 2 Moving the Printer Head
You are now able to move the printer head manually to the centre area of the printer. See below.
3


