


PCM 240 Projector Ceiling Mount • Installation
8
Installation, cont’d
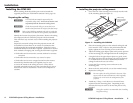
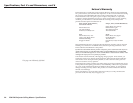
Attaching the tie wire
1. Cut four equal lengths of wire, sufficient to be terminated
at both ends (at ceiling and turnbuckles) with at least five
loops around itself.
2. Loop the wire through the anchors, eye screws, or over the
truss, and twist the wire around itself at least five times.
Figure 6 — Anchor and screw tie wire fastening
N The final loop should be tightly bent and secured to the
wire to avoid untwisting under stress.
3. Loop the wire through the turnbuckles, twisting the wire
around itself at least five times to secure it.
4. Using a wrench, adjust the turnbuckles to take up slack,
and to level the ceiling plate so it just rests on the grid. The
four support wires should be taut, and should take the full
weight of the completed installation.
5. Tighten the T-bar securing screws fully.
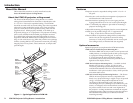
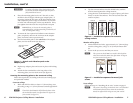
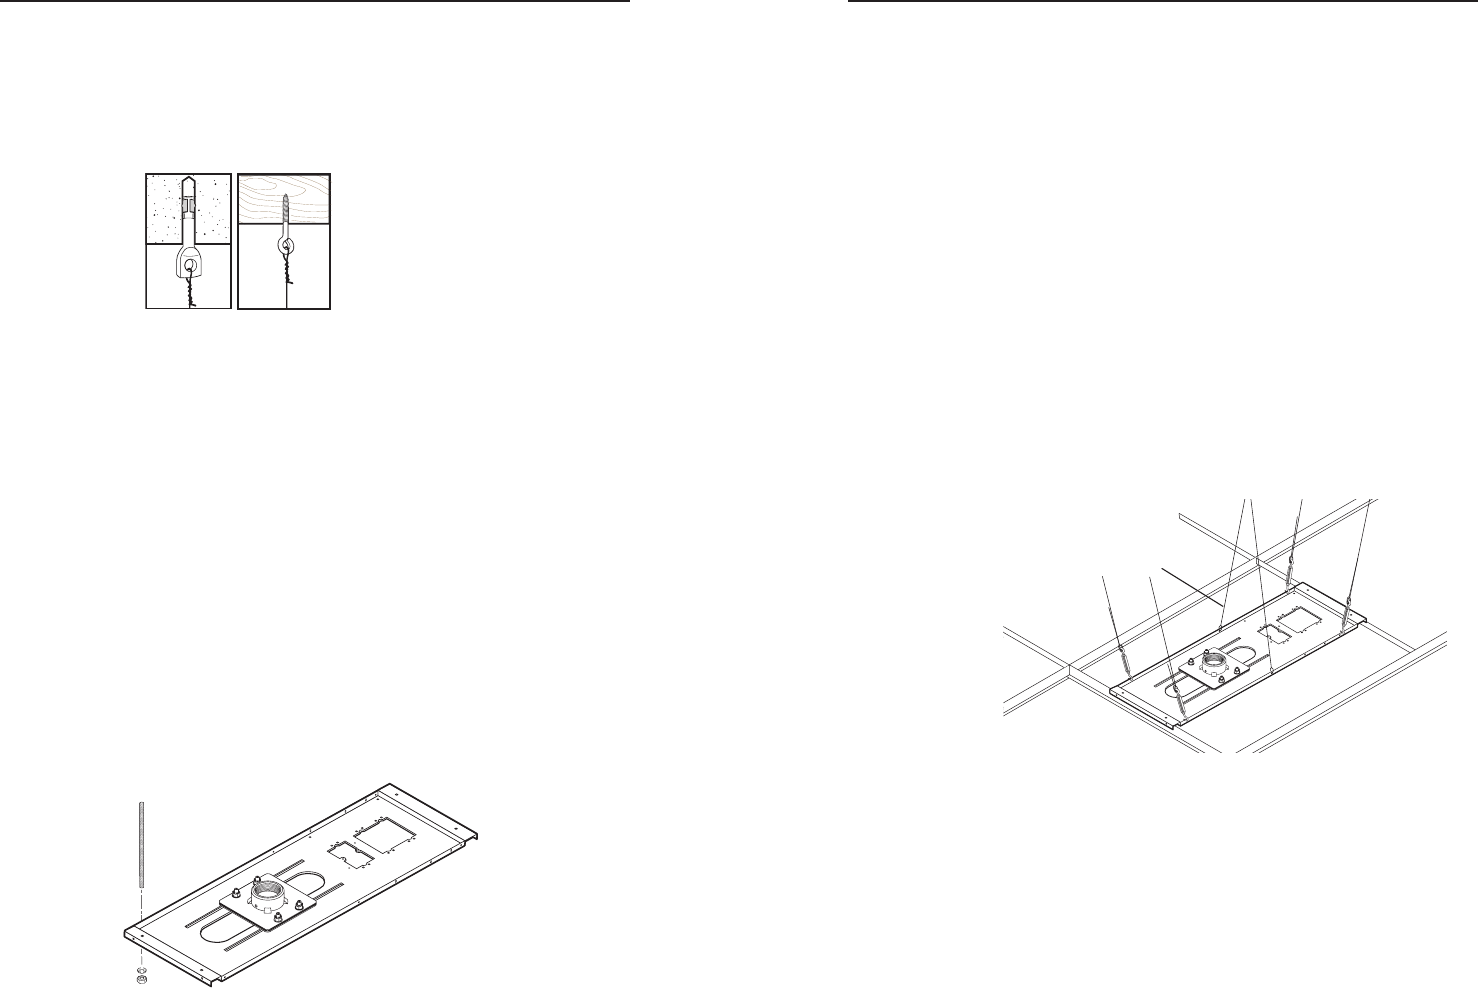
Threaded rod installation
If threaded rods (not supplied) are to be used instead of the
supplied tie wire to secure the plate to the ceiling, insert the
threaded rods through the holes at the ends of plate. Secure
with washers and nuts. Adjust the length as needed to ensure
the plate remains level and so it just rests on the T-bar. The rods
should take the full weight of the completed installation.
Insert threaded rods
through holes on the
ends of the
mounting plate.
Attach Washer and Nut and Secure
Figure 7 — Installing threaded rods on the PCM 240
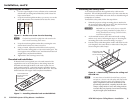
Attaching the safety cable
As an added precaution, the supplied safety cable must be
installed. This will help hold the mount up in the event that any
of the tie wires, or threaded rods come loose or detach during an
earthquake or accident.
To install the safety cable, follow the steps below:
1. When the projector ceiling mounting plate is attached to
the structural ceiling and rests on the T-bar, find and mark
a point directly above the plate’s center.
C DO NOT rest, or lean on the plate or suspended
ceiling grid during installation of safety cable, or
during installation and wiring of electrical boxes,
accessories and projector.
2. At the marked location, drill a hole and install a ceiling
anchor or eye screw, following the steps in “Securing the
mounting plate to the structural ceiling” on page 6.
3. Pass the safety cable through the anchor and attach it with
even lengths to the center holes on either side of the plate.
Secure using the cable clamps.
Attach safety cable
to center holes and
secure with cable clamps.
Figure 8 — Attach safety cable to the ceiling and
the PCM 240
N
As more items are installed (electrical boxes, projector,
and pole etc.), the tire wire and safety cable may become
stretched or may loosen under the combined weight.
Upon completion of the entire installation, and
periodically afterwards, carefully check the cable
clamps, safety cable, tie wire, and ceiling anchors
to ensure they are properly secured and are taking
the full weight of the installation.
PCM 240 Projector Ceiling Mount • Installation
9