X-24
11
3-9. Playback Frequency Response Calibration
Set the controls as follows.
Record track select switch: OFF
Dolby B noise reduction on/off switch: OFF
Connect an AC volt meter to the TAPE OUT 1 through 4 pin jacks respectively.
Playback the TCW-284F test tape and adjust R103 ~ R403 so that the output level at 6.3 kHz is 0.5 dB lower than
the 400 Hz output level.
Confirm that the output level at 12.5 kHz is within ± 1 dB of the 400 Hz output level.
1)
2)
3)
4)
3-10. Erase Current Adjustment
If the voltage at TP106 is adjusted at minimum, the erase current flowing the erase head is set to the maximum.
At adjusting the erase current, put a blank cassette tape to the transport and the track to be adjusted is put in REC mode.
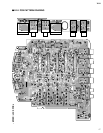
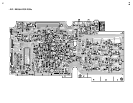
Assuming the track 1 to be adjusted, the oscilloscope probe is connected to the test point TP106 on the R/P PCB assy
and rotate and fix the core T101 for minimum voltage point. Then, confirm that the voltage at TP105 is more than 55 mV.
NOTE:
Adjust the remaining tracks in the same way.
Track 2:
Track 3:
Track 4:
Adjust T201 for minimum voltage at TP206. Then, confirm that the voltage at TP205 is more than 55 mV.
Adjust T301 for minimum voltage at TP306. Then, confirm that the voltage at TP305 is more than 55 mV.
Adjust T401 for minimum voltage at TP406. Then, confirm that the voltage at TP405 is more than 55 mV.
3-11. Coarse Bias Adjustment
At coarsely adjusting the bias current, put a blank cassette tape to the transport and the track to be adjusted is put
in REC mode. Assuming the track 1 to be adjusted, the oscilloscope probe is connected to the test point TP104 on
the R/P PCB assy and rotate and fix the pot R133 (220 kΩ) at 60 mV.
Adjust the remaining tracks in the same way.
Track 2:
Track 3:
Track 4:
Adjust R233 so that the voltage at TP204 is 60 mV.
Adjust R333 so that the voltage at TP304 is 60 mV.
Adjust R433 so that the voltage at TP404 is 60 mV.
The procedures up to 3-10 must be completed before proceeding to this adjustment.*
3-12. Record Level Calibration
Put a blank cassette tape to the transport and apply a 400 Hz, -10 dBV (0.3 V) sine wave signal to the INPUT 1 and
2 phone jacks. (In the case the signal is input from XLR jack, the terminal No.3 (COLD) and No. 1 (GND) must be
shortened.)
Set the controls as follows.
Record track select switch: All tracks ON (Confirm that the REC TRK LEDs (1 ~ 4) are blinking.)
Trim knob: At minimum
Dolby B noise reduction on/off switch: OFF
Connect an AC volt meter to the TAPE OUT 1 ~ 4 pin jacks.
Put the transport into REC PAUSE mode and adjust the Input Fader so that the level at TAPE OUT 1 ~ 4 is -10 dBV
(0.3 V).
Release the PAUSE button and start recording the signal.
After recording a certain length, rewind the tape to the start point of recording section. Then, playback the tape and
check the level at TAPE OUT 1 ~ 4. If the AC volt meter reading is not within -10 dBV (0.3 V) ± 0.5 dB, adjust the
pot R121 ~ 421 (22 kΩ) on the R/P PCB assy.
1)
2)
3)
4)
5)
6)
Playback the TCW-231 test tape and check the output level if it is -10 dBV (0.3 V) ± 1 dB reading.
If the reading is not within the above range, adjust R106 ~ R406 on the R/P AMP PCB assy.
3)
4)


